How to Use UV DTF Type B Without a Printer: The Complete Step-by-Step Guide
Read time: 11 minutes
Introduction
You want to decorate a glass tumbler, a phone case, a wooden panel, or a branded keychain — and you do not own a UV printer.
This is exactly the use case UV DTF Type B was designed for.
UV DTF Type B is a pre-printed, ready-to-apply transfer film that works without a UV printer, without a heat press, and without lamination equipment. The design is already on the film. You supply the surface, a squeegee, and about 60 seconds of effort.
But there is a gap between “possible” and “doing it well.” This guide covers the complete process — what Type B actually is and how it differs from Type A, every tool you need, the step-by-step application process, which surfaces work and which do not, and the troubleshooting fixes for every common failure. By the end, you will know not just how to apply UV DTF Type B, but how to get professional results every time.
Key Takeaways
- UV DTF Type B is a pre-printed, self-adhesive transfer film — no UV printer, no heat press, and no laminator are required for application
- The design comes ready on the B film; application involves peeling, positioning, pressing, and peeling the backing — the complete process takes under 2 minutes per transfer
- Surface preparation is the single most important variable in UV DTF Type B adhesion — any contamination (dust, oil, fingerprints, moisture) causes adhesion failure that cannot be fixed after application
- Compatible surfaces include glass, acrylic, smooth plastic, coated metal, ceramic, varnished wood, and phone cases — all must be smooth and non-porous
- UV DTF Type B does NOT work on fabric, rough surfaces, silicone, wax-coated surfaces, or surfaces treated with hydrophobic coatings
- Durability on properly prepared clean surfaces: waterproof, scratch-resistant, UV-stable — suitable for indoor permanent decoration and outdoor applications up to 1 to 2 years depending on UV exposure
- A UV DTF printer (combined with Type A film) enables printing custom designs; Type B is for applying pre-designed transfers — you cannot print custom designs onto Type B film without UV printer equipment
- For businesses doing more than 20 custom transfers per day, investing in a UV DTF printer reduces cost per transfer from $0.50 to $2.00 (buying pre-made Type B) to $0.10 to $0.40 (printing in-house)
What Is UV DTF Type B Film? The Clear Explanation
UV DTF Type B is the transfer carrier film in the UV DTF printing system — the film that holds a UV-printed design and delivers it to a hard surface.
To understand what Type B is, it helps to understand what it is not:
Type B is not a printable film. You cannot put it through a printer. It has no ink-absorbing coating for inkjet printing.
Type B is the adhesive carrier. Its function is to hold the cured UV ink design (which was originally printed onto Type A film) and transfer it to the final surface using pressure alone — no heat, no UV light, no additional equipment at application time.
Why Pre-Printed Type B Exists
In the standard UV DTF workflow, you need a UV printer to print onto Type A film, then laminate Type B over it, peel Type A away, and apply the design using Type B.
Pre-printed UV DTF Type B bypasses the printing step entirely. The design has already been printed onto Type A film, laminated with Type B, and Type A has already been peeled — by the manufacturer or transfer supplier. What you receive is the Type B film with the UV-cured design already on its adhesive surface, ready to be pressed directly onto your target object.
This means:
- No UV printer required
- No Type A film required
- No laminator required
- No UV light equipment required at your end
You simply apply what has already been prepared.
UV DTF Type A vs Type B: What Is the Difference?
This is the most common source of confusion in the UV DTF system.
| Feature | Type A Film | Type B Film |
|---|---|---|
| Function | Printable surface — UV ink is deposited here | Transfer carrier — holds and delivers the design |
| Coating | Ink-absorbing coating for UV-curable ink adhesion | Pressure-sensitive adhesive surface |
| Used with UV printer | Yes — printed directly | No — receives the design from A film via lamination |
| Used in application | Peeled away after lamination with B film | Applied to the final surface; peeled after transfer |
| Pre-printed versions | Not applicable | Yes — design already laminated; ready to apply |
| Requires UV printer | Yes | No (when pre-printed) |
The Complete Standard UV DTF Workflow (With Printer)
- UV printer prints design onto Type A film (white + CMYK + varnish layers)
- Type B film is cold-laminated over the printed Type A film
- Type A film is peeled away — the UV-cured design transfers to Type B’s adhesive
- Type B (with design) is applied to the target surface by hand pressure
- Type B backing is peeled — design remains on the surface
The Pre-Printed Type B Workflow (Without Printer)
Steps 1, 2, and 3 are already done by the supplier.
You receive Type B film with the design already on the adhesive surface. You perform only steps 4 and 5.
Why Use UV DTF Type B Without a Printer?
There are three legitimate reasons to use pre-printed Type B without owning a UV printer:
1. You do not need custom designs — you need volume of existing designs
Businesses applying the same brand logo or design to hundreds of products — branded tumblers, promotional keychains, corporate gifts — can source pre-printed Type B in quantity from a supplier. No printer investment required. The design is already produced.
2. You are testing the UV DTF market before investing in equipment
Pre-printed Type B lets you validate customer demand, refine your application process, and build a client base before committing $3,000 to $15,000 to UV printer equipment. The investment sequence makes business sense.
3. You need one-off custom applications without production scale
For occasional custom applications — a personalized gift, a one-time event, a prototype — sourcing a pre-printed transfer from a wholesale supplier is more economical than owning and maintaining a UV printer for low frequency use.
The important limitation: Without a UV printer, you cannot create new custom designs in-house. You are limited to designs that already exist as pre-printed Type B transfers. For fully custom on-demand decoration, a UV DTF printer is required.
What You Need Before You Start
Required Tools and Materials
Pre-printed UV DTF Type B transfer The film with your design already on the adhesive surface, ready to apply. Available from UV DTF wholesale suppliers and printing services. Confirm the design is face-down on the carrier (adhesive side outward) before ordering.
Isopropyl alcohol (IPA) — 70% or higher For surface cleaning. This is the most critical consumable in the entire process. Any contamination on the surface prevents adhesion. IPA removes oils, fingerprints, dust, and surface residues that water alone cannot.
Clean lint-free cloth or microfiber wipe For applying IPA without leaving lint on the surface. Paper towels leave fiber residue that interferes with adhesion. Use a proper microfiber cloth or optical cleaning wipe.
Squeegee, credit card, or soft rubber applicator For pressing the Type B film firmly onto the surface and eliminating air bubbles. A flat plastic card works for most applications. A soft rubber squeegee produces more even pressure on slightly irregular surfaces.
Scissors or craft knife For trimming the transfer to size if needed. Most pre-printed Type B transfers are pre-cut to the design outline.
Optional but recommended:
- Tape measure or ruler for precise positioning
- Masking tape for registration alignment on repeat applications
- Soft cloth for final burnishing over the transfer after application
Step-by-Step: How to Apply UV DTF Type B Without a Printer
Step 1 — Inspect the Transfer
Before touching the target surface, inspect your Type B transfer:
- Confirm the design is face-down on the carrier film — the design should be visible from the back of the carrier (mirror image), not the front
- Check for any visible defects: missing areas, color inconsistencies, edge damage
- Confirm the transfer size fits the application area with appropriate margins
If the transfer arrived with a protective backing sheet, do not remove it yet. You will peel it just before application.
Step 2 — Prepare the Surface
This is the most important step. Surface contamination is the cause of the vast majority of UV DTF Type B adhesion failures.
Clean with isopropyl alcohol: Apply IPA generously to a clean lint-free cloth. Wipe the application area thoroughly in one direction — do not back-and-forth wipe in multiple directions, which can redistribute oils rather than removing them. Allow 30 to 60 seconds for the IPA to fully evaporate before proceeding. The surface must be completely dry.
Do not touch the cleaned surface with bare hands after cleaning. A single fingerprint deposits enough oil to cause a visible adhesion failure at that point.
Pre-cleaning considerations by surface type:
- Glass: IPA wipe, allow to dry fully. Hold by the edges after cleaning.
- Metal: IPA wipe. Confirm no protective coatings or oils remain from manufacturing.
- Ceramic/mugs: IPA wipe. Avoid applying where the surface is glazed with a matte, textured, or raw finish — these do not bond reliably.
- Acrylic: IPA wipe. Use a soft cloth — acrylic scratches easily.
- Phone cases: IPA wipe. Confirm the case is not silicone — silicone does not bond with pressure-sensitive adhesive.
Step 3 — Position the Transfer (Dry Run)
Before peeling any backing, do a dry run — place the transfer (still with backing intact) onto the clean surface to confirm positioning, alignment, and size.
For designs that must align precisely (centered logos, edge-to-edge coverage), mark the intended position with small pieces of masking tape on the surface edges before cleaning. Remove the tape after cleaning and use the marks as guides.
Step 4 — Peel the Backing
Peel the protective liner from the back of the Type B transfer to expose the pressure-sensitive adhesive surface. Peel slowly and evenly from one corner — rushing causes static buildup that attracts dust to the adhesive.
After peeling, handle the transfer by its edges only. The adhesive surface is now live — any contact with non-target surfaces, lint, or oils compromises the application.
Important: Work quickly after peeling. Exposed pressure-sensitive adhesive attracts airborne dust within minutes in most indoor environments. Aim to position and press within 30 seconds of peeling.
Step 5 — Apply the Transfer to the Surface
Position the transfer on the surface. Once the adhesive contacts the surface, repositioning causes adhesive distortion and reduces bond strength — aim to place it correctly on the first contact.
Place one edge down first, then roll the transfer onto the surface progressively to minimize air entrapment. For flat surfaces, a single gentle press across the full area works. For curved surfaces (tumblers, bottles), work from the center outward following the curvature.
Step 6 — Press and Burnish
Using a squeegee, credit card, or your thumb, apply firm and even pressure across the entire design area. Work from the center outward toward the edges to push any trapped air bubbles out rather than trapping them at the center.
Pressure technique:
- Flat surfaces: press firmly in overlapping strokes covering the full design area, minimum two passes
- Curved surfaces: follow the curvature, applying pressure with the squeegee perpendicular to the curve direction
- Edge areas: press firmly along all design edges — edge adhesion is where failures start if pressure is insufficient
The goal is full, uniform contact between the adhesive and the surface with no air pockets or unbonded areas.
Step 7 — Peel the Carrier Film
The carrier film (the outer layer of the Type B system) must now be peeled to reveal the finished design.
Peel at a flat, low angle — 15 to 30 degrees from the surface — rolling the carrier back slowly and evenly. This is a cold-peel process: no heat is involved.
Peel speed matters: Peeling too fast creates mechanical stress that can lift the design edges from the surface. Peel slowly and consistently.
If the design starts lifting with the carrier: Stop immediately. Press the lifted area back down firmly and allow 30 to 60 seconds of additional dwell time before attempting to peel again. If the design consistently lifts, the surface was either not clean enough or is not compatible with UV DTF adhesive.
Step 8 — Final Inspection and Burnishing
After the carrier is fully removed, inspect the design for any air bubbles, lifted edges, or adhesion gaps.
For small air bubbles: Use a soft cloth to press the bubble toward the nearest edge. Small bubbles (under 3mm) in the center of the design often flatten on their own within 24 hours as the adhesive fully sets.
For lifted edges: Press firmly with your fingertip or the squeegee edge and hold for 10 to 15 seconds. The body heat from your fingertip slightly softens the adhesive and improves contact.
Final burnish: Cover the applied design with a soft cloth and press firmly across the full area one more time. This final press sets the adhesive fully and significantly improves long-term durability.
Allow the applied design to cure undisturbed for at least 30 minutes before the object is handled, washed, or used. Full adhesive cure takes 24 hours for maximum durability.
Compatible Surfaces for UV DTF Type B
UV DTF Type B works on smooth, non-porous surfaces. The adhesive requires direct contact with a clean, flat surface to bond effectively.
| Surface Type | Compatibility | Notes |
|---|---|---|
| Clear glass | Excellent | Most reliable substrate — clean thoroughly |
| Frosted glass | Good | Slight texture — press firmly, test first |
| Ceramic (glazed) | Excellent | Clean glaze only — not raw or matte ceramic |
| Acrylic / Plexiglass | Excellent | Clean gently — scratches easily |
| Smooth plastic (PVC, ABS) | Good | Confirm surface is not treated with release agent |
| Coated metal (powder coat) | Good | Test adhesion — some powder coatings reduce bond |
| Polished stainless steel | Good | Clean IPA residue thoroughly |
| Aluminum | Good | Clean thoroughly — no anodizing oils |
| Hard phone cases (polycarbonate) | Excellent | Not silicone — silicone cases do not bond |
| Varnished / lacquered wood | Acceptable | Varnish must be fully cured and smooth |
| Resin coated surfaces | Good | Fully cured resin only |
Surfaces UV DTF Type B Does NOT Work On
Understanding incompatible surfaces prevents wasted transfers and application failures.
Fabric and textiles: UV DTF (both Type A and B) is not designed for fabric. Fabric is porous and flexible — the adhesive cannot achieve the surface contact required for bonding, and the cured UV ink layer will crack with fabric movement. For fabric decoration, standard DTF film with hot-melt powder and a heat press is the correct product.
Silicone: Silicone surfaces are chemically inert and have extremely low surface energy — pressure-sensitive adhesives do not bond to silicone. Silicone phone cases, silicone kitchen items, and silicone grips are not compatible.
Heavily textured surfaces: Rough concrete, unfinished wood, rough fabric, heavily textured plastics — the adhesive can only contact the raised texture peaks, not the recessed areas, producing extremely weak overall adhesion.
Wax-coated or hydrophobic surfaces: Surfaces treated with wax, silicone sprays, PTFE coatings, or water-repellent treatments have low surface energy that prevents adhesive bonding. Common examples: some car interiors, some outdoor equipment surfaces, some treated leather.
Raw or matte ceramic: Unglazed ceramic is porous. The adhesive penetrates the pores rather than forming a surface bond — initial adhesion appears acceptable but fails quickly.
Curved surfaces with radius under 2cm: Very tight curves cause the rigid UV-cured ink layer to crack during application or shortly after, because the ink cannot flex to match the surface curvature. Standard Type B works on gentle curves (tumblers, bottles) but not sharp curves (pencil-width cylinders, tight edges).
Troubleshooting: Common Problems and Fixes
Design Lifts at Edges During Peel
Cause: Insufficient pressure at edges during application, or surface contamination at the perimeter.
Fix: After peeling, press the lifted edges firmly with a fingertip or squeegee for 15 to 20 seconds. If this is a consistent problem, increase pressure during application — specifically focus on edge areas after the main burnish pass.
Air Bubbles Under the Transfer
Cause: Applying the full transfer flat rather than rolling progressively from one edge, trapping air in the middle.
Fix: For small bubbles under 3mm: press toward the nearest edge with a soft cloth — bubbles often flatten within 24 hours. For large bubbles: carefully lift the nearest edge of the design (if less than 30 seconds since application) and re-apply rolling progressively. After full cure, large bubbles cannot be removed without damaging the design.
Design Peels Off After Days
Cause: Surface contamination that was not fully removed before application, or incompatible surface material.
Fix: Surface preparation is non-negotiable. IPA cleaning must be followed by full evaporation drying before application. If contamination is the cause, there is no fix after application — the transfer must be removed and reapplied to a properly cleaned surface. Test a small piece of Type B on the specific surface before committing a full transfer.
Carrier Film Peels the Design Off With It
Cause: Adhesion between design and surface is weaker than adhesion between design and carrier. Usually surface preparation failure or incompatible surface.
Fix: Press the lifted area back down firmly. Allow 2 to 3 minutes of additional dwell time before attempting to peel the carrier again. Peel at a flatter angle and more slowly. If the problem persists, the surface is either contaminated or incompatible — do not force the peel.
White Areas of the Design Look Yellow
Cause: UV degradation on white UV ink exposed to direct sunlight over time. More common on outdoor applications.
Fix: For outdoor applications, source UV DTF Type B printed with UV-stabilized inks. Yellowing of white areas is a material selection issue, not an application issue.
Edges of the Design Look Rough or Frayed
Cause: The transfer was cut with dull scissors creating a ragged edge, or the original design had rough edge quality.
Fix: Use sharp scissors or a craft knife for trimming. For mass production, plotter-cut transfers produce cleaner edges than hand-cut.
How Long Does UV DTF Type B Last?
When properly applied to a compatible, clean surface, UV DTF Type B transfers are:
Waterproof: The cured UV ink is a solid polymer layer that does not absorb water. Dishwasher-safe for glass and ceramic when the design is on the exterior surface above the waterline.
Scratch-resistant: The UV-cured polymer is harder than most substrate surfaces. Light scratching does not damage the design; abrasive cleaning tools can damage the surface.
UV-stable (with UV-stabilized inks): Quality UV inks contain UV stabilizers that prevent fading from solar UV exposure. Standard Type B with quality inks: 1 to 2 years outdoor durability. Indoor applications: 3 or more years without visible degradation.
Typical service life by application:
- Indoor glass (tumblers, glasses): 1 to 3 years with normal handling and dishwasher use
- Outdoor signage (smooth metal, acrylic panels): 1 to 2 years at standard UV exposure
- Phone cases (handled daily): 6 months to 1 year depending on handling intensity
- Promotional items (occasional handling): 2 to 5 years
The primary failure modes are: edge lifting from mechanical contact, yellowing of white areas from UV exposure, and adhesion failure from improper surface preparation.
When to Upgrade to a UV DTF Printer
UV DTF Type B without a printer works well in specific scenarios. It becomes limiting when:
You need custom designs on demand. Pre-printed Type B requires ordering from a supplier — lead time, minimum quantities, and no instant customization. A UV DTF printer produces any design immediately.
Your volume exceeds 20 custom applications per day. Pre-made transfers at $0.50 to $2.00 each add up faster than the equipment cost at production volume.
Your designs change frequently. Pre-printed Type B is economical for fixed designs in volume; it is expensive for one-off or frequently changing designs.
You want to expand to A+B in-house production. A UV DTF printer combined with Type A film enables the full workflow — print, laminate, apply — for maximum design flexibility and minimum per-transfer cost.
UV DTF Printer Categories
Entry-level UV DTF printer ($3,000 to $6,000): Desktop or small-format UV flatbed. Suitable for 10 to 50 transfers per day. Handles A3 and smaller format objects.
Mid-range UV printer ($6,000 to $15,000): Wide-format UV flatbed. Suitable for 50 to 200 transfers per day. Handles larger objects and sheets.
Production UV printer ($15,000 to $50,000+): High-speed industrial flatbed UV. For 200+ transfers per day at commercial production scale.
When evaluating UV printer investment, Haiyi UV DTF film — designed for use with UV printers — provides the Type A and Type B film needed for in-house production. Factory-direct wholesale pricing on both A and B film reduces consumable costs at any production volume.
UV DTF Printer vs Pre-Made Type B: Cost Comparison
| Scenario | Pre-Made Type B | In-House UV Printer |
|---|---|---|
| Equipment investment | $0 | $3,000–$15,000 |
| Cost per transfer (standard size) | $0.50–$2.00 | $0.10–$0.40 |
| Lead time for new designs | 1–5 days (order from supplier) | Immediate |
| Minimum quantity per design | Often 10–50 pieces | 1 piece |
| Custom one-off designs | Expensive or unavailable | Standard |
| Break-even vs buying transfers | N/A | ~300–800 transfers |
At 20 transfers per day, the break-even point for a $3,000 UV printer investment versus buying pre-made Type B at $1.00 each is approximately:
$3,000 ÷ ($1.00 – $0.25 in-house cost) = 4,000 transfers = 200 production days
At 50 transfers per day: break-even in 80 production days — approximately 3 to 4 months.
FAQ
What is UV DTF Type B film? UV DTF Type B is the transfer carrier film in the UV DTF system. In the standard workflow, it is laminated over a design printed on Type A film, then used to apply the design to a hard surface by pressure. Pre-printed versions come with the design already on the adhesive surface — no UV printer required for application.
Can you use UV DTF Type B without a UV printer? Yes. Pre-printed UV DTF Type B transfers come with the design already applied. You need only to clean the target surface, peel the backing, press the film onto the surface, and peel the carrier — no UV printer, heat press, or laminator required.
What surfaces work best with UV DTF Type B? Smooth, non-porous surfaces work best: glass, acrylic, polished metal, glazed ceramic, hard plastic (polycarbonate phone cases), and varnished wood. The surface must be scrupulously clean — wipe with isopropyl alcohol and allow to dry fully before application.
Does UV DTF Type B work on fabric? No. UV DTF — both Type A and Type B — is designed for hard, non-porous surfaces. For fabric decoration, standard DTF film with hot-melt powder and a heat press is the correct product. UV DTF ink cannot bond to fabric fibers and will crack with fabric movement.
How do I apply UV DTF Type B without a printer? Clean the surface with isopropyl alcohol. Allow to dry. Peel the backing from the pre-printed Type B transfer. Position and press onto the surface starting from one edge and rolling progressively. Burnish firmly with a squeegee. Peel the carrier film at a flat angle slowly. Final burnish with a soft cloth.
Why is my UV DTF Type B peeling off the surface? The most common cause is surface contamination. Even a fingerprint after IPA cleaning is enough to cause adhesion failure. Re-clean the surface with fresh IPA and allow full drying. Ensure the surface is compatible — silicone, raw ceramic, fabric, and wax-coated surfaces do not bond with UV DTF adhesive.
How long does UV DTF Type B last? On properly prepared compatible surfaces: indoor applications 1 to 3 years, outdoor applications 1 to 2 years depending on UV exposure. UV-stabilized inks extend outdoor durability. The design is waterproof and scratch-resistant when properly applied.
When should I buy a UV DTF printer instead of using pre-made Type B? Consider a UV DTF printer when you need custom designs on demand, your volume exceeds 20 transfers per day, or your designs change frequently. At 50 transfers per day, a $3,000 UV DTF printer investment breaks even versus buying pre-made transfers at $1.00 each in approximately 80 production days.
What is the difference between UV DTF Type A and Type B? Type A film is the printable surface — UV ink is printed directly onto Type A using a UV printer. Type B film is the transfer carrier with pressure-sensitive adhesive — it holds and delivers the design to the final surface. In use, Type B is laminated over printed Type A, then Type A is peeled, leaving the design on Type B ready for application to the target surface.
Conclusion
UV DTF Type B without a printer is straightforward when the process is understood clearly.
The design is already on the film. Your job is surface preparation and application — two steps that take under 5 minutes total. The results are professional: waterproof, scratch-resistant, UV-stable transfers on glass, acrylic, metal, ceramic, and hard plastic.
The three things that determine success or failure:
1. Surface preparation. Isopropyl alcohol, complete drying, and no touching the clean surface with bare hands. This step is the primary cause of all adhesion failures. Do it properly every time.
2. Application technique. Roll onto the surface progressively from one edge. Burnish firmly covering the full design area including edges. Peel the carrier at a flat angle slowly.
3. Surface compatibility. Smooth, non-porous surfaces only. No fabric. No silicone. No rough textures. If unsure, test a small piece before committing a full transfer.
The limitation of working without a UV printer is design flexibility — you are limited to pre-printed designs sourced from suppliers. For fully custom on-demand decoration at production scale, a UV DTF printer unlocks the complete workflow. The pre-made Type B approach is the right starting point for validating the process and the market before making that equipment investment.
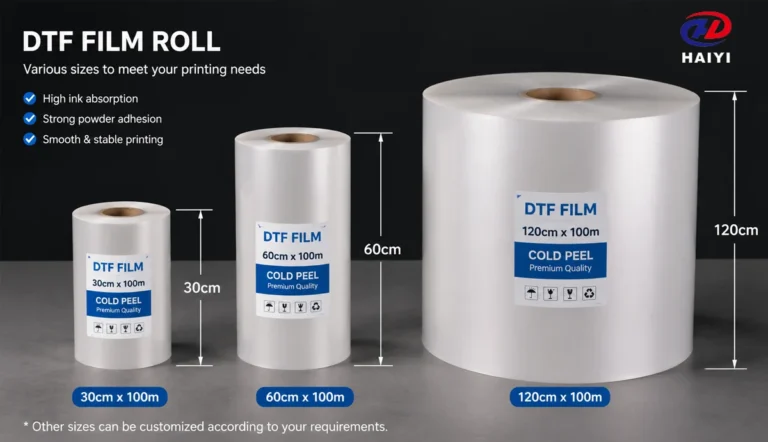
Haiyi manufactures UV DTF film — both Type A and Type B — as part of its full heat transfer consumables range. UV DTF A film in 30cm (A3) and 60cm widths with clear and white ground variants. Factory-direct wholesale pricing, low MOQ, and 15 years of international export experience. For operations ready to move to in-house UV DTF printing, Haiyi supplies the complete A/B film system alongside standard DTF film, sublimation paper, and reflective transfer film.