Read time: 14 minutes
Introduction
DTF printing looked complicated the first time you heard about it. Film, powder, curing, pressing, peeling — five steps before you have a finished shirt.
Here is what nobody tells beginners: each step is simple on its own. The complexity only appears when you try to skip one or guess at the settings.
This guide walks through every step of using DTF film from scratch — the equipment you need, the exact process from design file to finished garment, how to apply transfers at home with or without a heat press, and the most common mistakes beginners make in the first week. Follow it in order and you will produce professional-quality transfers on your first attempt.
Key Takeaways
- DTF printing works on any fabric color and type — cotton, polyester, blends, nylon, denim — with no pretreatment required
- The complete process has five stages: print onto DTF film, apply adhesive powder, cure the powder, press to fabric, peel the film
- A heat press is strongly preferred over an iron — irons produce approximately 30% success rate due to uneven pressure; a heat press produces 98%+ consistent results
- DTF film quality directly affects print quality — dual-matte anti-static film from a manufacturer that controls its own coating formula eliminates the most common beginner failures
- A second press after peeling — 5 to 10 seconds through parchment paper — is the single most impactful step for wash durability
- DTF printing vs sublimation: DTF works on any fabric and any color; sublimation is limited to white or light polyester
- A properly applied DTF transfer lasts 50 or more wash cycles without peeling, cracking, or fading
- Beginners can produce good results with a desktop A3 DTF printer, a basic powder shaker, and a 15×15 inch heat press — total setup cost from $600 to $1,500
What Is DTF Film and How Does It Work?
DTF stands for Direct to Film. Instead of printing directly onto a garment like DTG (Direct to Garment), or cutting vinyl like HTV, DTF printing creates a transfer on a special coated PET film — then heat-presses that transfer onto the fabric.
The PET film — the DTF film — is the surface the design is printed on. It has a specialized coating that holds DTF ink precisely, accepts adhesive powder, and releases cleanly from the design after pressing.
Here is why DTF became the preferred method for home and small business garment printing:
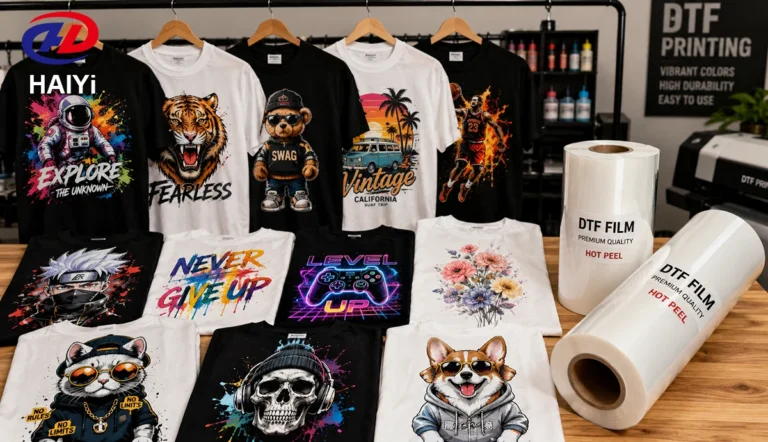
Works on everything. Cotton, polyester, blends, denim, nylon, leather, canvas. Any fabric color — black, white, red, anything. No pretreatment required.
No minimums. Print one shirt as profitably as printing one hundred. Screen printing requires 12 to 24 pieces minimum to be economical. DTF does not.
Full color, full detail. Photo-realistic images, gradients, fine text, and complex artwork all print at the same cost as simple logos. Color complexity does not add cost.
Durable results. A correctly applied DTF transfer on quality film survives 50 or more wash cycles. That is professional apparel durability.
What You Need Before You Start
Option A: Full In-House DTF Setup
If you want to print your own transfers from scratch, you need four things working together.
DTF Printer A dedicated DTF printer deposits white ink, CMYK color layers, and sometimes a varnish layer onto DTF film. Desktop A3 units handle prints up to approximately 13×19 inches per sheet — the right size for most garment printing applications.
Cost range: $600 to $1,500 for a desktop A3 unit.
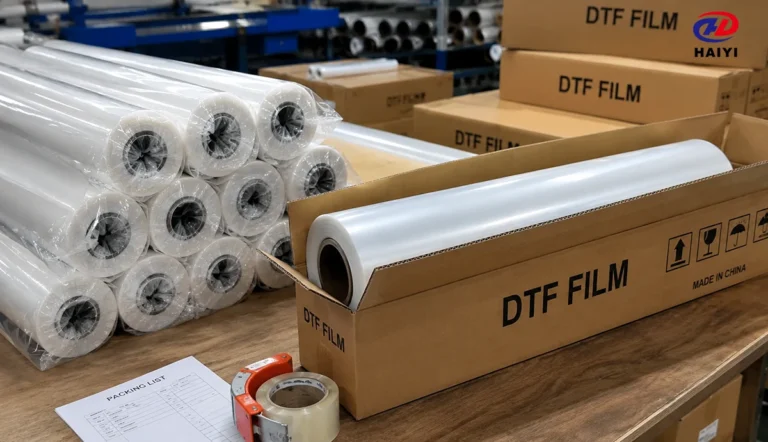
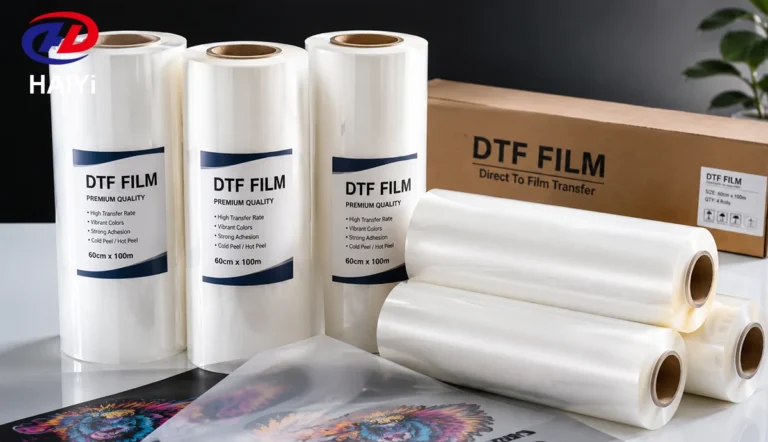
DTF Film This is the coated PET substrate the design is printed onto. The film coating determines how well ink absorbs, how evenly powder adheres, and how cleanly the transfer releases from the film after pressing.
Dual-matte anti-static DTF film is the recommended format for beginners and production shops alike. The anti-static surface prevents powder from clinging to non-printed areas, which is one of the most common beginner quality failures.
Available in sheet format (A3/A4 packs) for beginners and 100m rolls for production.
Adhesive Powder and Curing System Hot-melt adhesive powder (TPU — Thermoplastic Polyurethane) is applied to the wet ink immediately after printing. It is then melted and bonded to the ink layer using heat — a process called curing.
Curing options: heat gun (entry level), curing oven (more consistent), or integrated powder-shaker-curing unit (production level).
Cost range: Powder $15 to $40 per kg. Desktop powder shaker with curing: $200 to $600.
Heat Press The heat press bonds the cured transfer to the fabric. A 15×15 inch clamshell or swing-away press covers standard adult shirt sizes.
Cost range: $150 to $400 for a basic unit. Swing-away press is worth the extra cost — it reduces smearing during transfer placement.
Option B: Heat Press Only (Buy Pre-Made Transfers)
You do not need a DTF printer to apply DTF transfers. Pre-made transfers are available from wholesale transfer suppliers — you submit your design, they print and ship the transfer. You apply it with your heat press.
This approach requires only a heat press ($150 to $400) and eliminates the printing, powdering, and curing steps. Margins per shirt are lower than printing yourself, but startup cost and complexity are minimal.
Consumables List
| Item | Purpose | Cost Estimate |
|---|---|---|
| DTF film (A3 sheets x 100) | Print surface | $25 to $50 |
| DTF ink set (CMYK + White) | Printing | $60 to $180 |
| Hot-melt adhesive powder (1 kg) | Adhesion layer | $15 to $40 |
| Blank shirts | Canvas | $3 to $8 each |
| Parchment paper or Teflon sheet | Second press barrier | $5 to $15 |
Step-by-Step: How to Use DTF Film and Powder
This is the complete workflow from design file to finished transfer, ready to press onto a shirt.
Step 1 — Prepare Your Design
Create or source your design using design software. Free options: Canva, GIMP, Inkscape. Paid options: Adobe Illustrator or Photoshop.
File requirements:
- Format: PNG with transparent background
- Resolution: 300 DPI minimum
- Color mode: RGB
Important: Do not mirror the design before printing. DTF RIP software handles mirroring automatically. Manually mirroring your file before sending it to the RIP will result in a reversed print.
For designs that will be placed on dark fabrics, ensure your design has no transparent or semi-transparent areas — the white ink layer printed first creates opacity across the full design area.
Step 2 — Set Up RIP Software
RIP (Raster Image Processor) software controls how the DTF printer layers ink. Load your PNG into the RIP software, set the white underbase settings for dark fabric compatibility, and arrange multiple designs on a single film sheet — called gang sheeting.
Gang sheeting is the most important efficiency practice in DTF printing. Fitting multiple designs on one sheet reduces cost per transfer significantly. For an A3 sheet, fitting 4 to 6 smaller designs instead of printing one at a time cuts film and ink cost by 60 to 80%.
Step 3 — Load DTF Film and Print
Load your DTF film into the printer with the printable coated side facing the print heads. The correct side is typically the matte or frosted-looking surface. The reverse side is usually glossy — do not print on this side.
Press print. The DTF printer deposits:
- White ink first (creates opacity for dark fabric compatibility)
- CMYK color layers on top of white
- Varnish layer last (optional — adds gloss and scratch resistance)
Print time for an A3 sheet: approximately 2 to 8 minutes depending on printer speed and resolution setting.
Handle the printed film carefully after printing. The ink is wet. Do not stack printed sheets face-down or touch the ink surface.
Step 4 — Apply Adhesive Powder While Ink Is Wet
This step must be done immediately after printing, while the ink is still wet. The powder adheres only to wet ink — wait too long and the ink begins to dry, and the powder will not stick correctly.
How to apply powder:
- Place the printed film ink-side up on a clean surface or in a powder tray
- Sprinkle hot-melt adhesive powder evenly across the entire printed surface — cover more area than you think you need
- Gently tilt and shake the film to distribute the powder across all printed areas
- Tap the back of the film gently to dislodge excess powder from unprinted areas
- Shake off all excess powder — only the printed (wet ink) areas should retain powder
Common beginner mistake: Applying too little powder to the edges and fine details of the design. These areas peel first after washing. Make sure powder coverage reaches all edges of the design.
Second common mistake: Waiting too long after printing. If the ink dries before powder is applied, adhesion will be poor. Print one sheet, powder it, then print the next.
Step 5 — Cure the Powder
Curing melts the adhesive powder and bonds it permanently to the ink layer. Under-cured powder looks loose and chalky. Correctly cured powder has a smooth, slightly textured surface with a faint sheen — similar to an orange peel appearance.
Curing methods:
Heat gun: Move the heat gun continuously over the film surface at 6 to 8 inches distance until all powder melts. Takes 30 to 90 seconds. Produces uneven results — some areas may be over-cured while others are under-cured. Acceptable for very low volume only.
Curing oven: Even heat at 250 to 280°F (120 to 140°C) for 60 to 120 seconds. Produces consistent results across the entire sheet. The professional standard for production.
Powder shaker with curing unit: Automated powder application and curing in one pass. Most efficient for production volume. The transfer sheet exits the unit ready to press.
How to check for correct cure: The powder surface should appear smooth, continuous, and slightly shiny. If any powder appears loose, powdery, or flat-matte, the transfer is under-cured — apply more heat time.
Let the cured transfer cool completely before pressing to the shirt.
Step 6 — Store or Use Immediately
Cured transfers can be stored flat in a cool, dry location for weeks or months before pressing. Keep them away from moisture and direct sunlight. Do not stack them without a paper separator — the adhesive surface can stick to itself.
How to Apply DTF Transfers to Shirts
This section covers pressing cured transfers onto garments — whether you made them yourself or purchased pre-made transfers.
Step 1 — Set Up Your Heat Press
Set your heat press to the correct temperature and time for your fabric.
| Fabric | Temperature | Time | Pressure |
|---|---|---|---|
| 100% Cotton | 315-325°F (157-163°C) | 10-12 sec | Medium-High |
| Cotton/Poly Blend | 305-315°F (152-157°C) | 10-12 sec | Medium-High |
| 100% Polyester | 280-300°F (138-149°C) | 10-12 sec | Medium |
| Performance Fabric | 300-315°F (149-157°C) | 12-15 sec | Medium-High |
Verify your actual press temperature with a contact thermometer before running production. Heat press displays are frequently inaccurate by 10 to 30 degrees.
Step 2 — Pre-Press the Garment
Place the empty shirt on the press platen and press for 3 to 5 seconds. This removes moisture from the fabric and smooths wrinkles. Moisture in the fabric is the most common cause of edge lifting — this step prevents it.
Step 3 — Position the Transfer
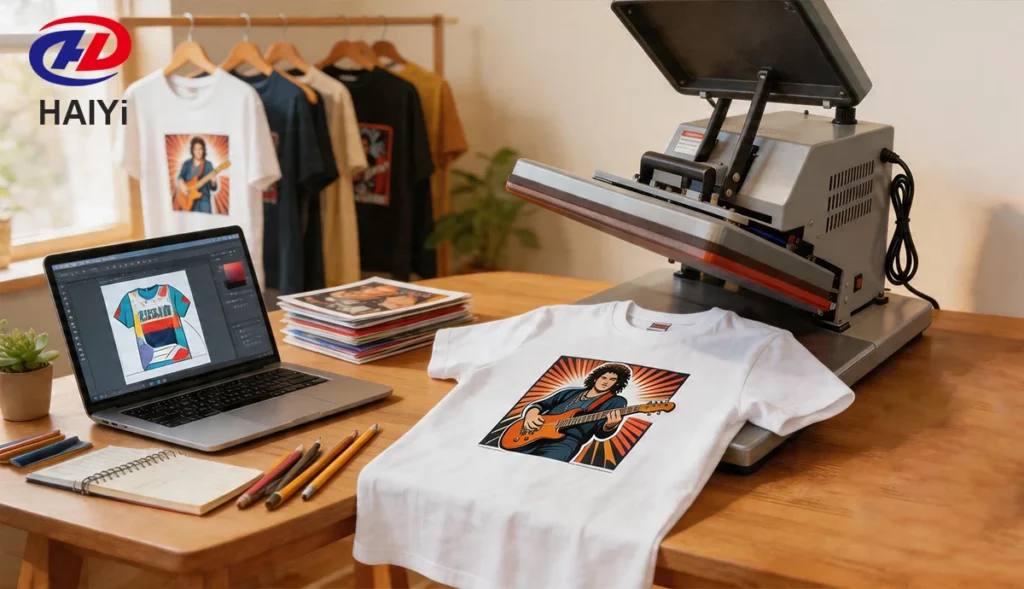
Place the cured DTF transfer face-down on the garment — film side facing up, ink side facing the fabric. Position carefully before lowering the press. Once heat is applied, you cannot reposition.
Step 4 — First Press
Lower the heat press and apply heat for the time specified for your fabric. Apply firm, even pressure. The platen should compress the garment surface slightly.
Step 5 — Peel the Film
Open the press and remove the garment. Two options:
Hot peel: Peel the carrier film immediately while still warm. Faster workflow. Acceptable for most applications.
Cold peel: Allow the transfer to cool completely (60 to 90 seconds) before peeling. Produces better edge definition and wash durability. Recommended for fine-detail designs and performance fabrics.
Peel slowly at a flat, low angle — rolling the film back rather than pulling it perpendicular to the shirt. Fast peeling causes edge lifting.
Step 6 — Second Press (Do Not Skip This)
After peeling, place parchment paper or a Teflon sheet over the design and press again for 5 to 10 seconds at the same temperature and medium pressure.
This step drives the adhesive deeper into the fabric fiber, seals the design edges, and is the primary determinant of whether transfers last 20 washes or 50. Skipping this step is the most common reason for premature peeling in production.
Step 7 — Quality Check
Before delivering to a customer, perform a quick quality check:
- Lightly scratch the edge of the design with a fingernail — no ink should come away
- Check edges visually for any lifting or gaps
- Flex the shirt — the design should move with the fabric without cracking
How to Apply DTF Transfers with an Iron
A heat press is the professional standard for DTF transfers. An iron can work in a pinch, but with significant limitations.
Success rate comparison: Professional heat press — 98%+ consistent adhesion. Household iron — approximately 30%, due to uneven pressure and inaccurate temperature.
Use an iron only for occasional one-off projects where durability is not critical. For anything you intend to sell or wash regularly, use a heat press.
How to Apply DTF Transfers at Home with an Iron
What you need:
- Household iron (steam function turned completely OFF — no water in reservoir)
- Hard, flat, heat-resistant surface
- Parchment paper or Teflon sheet
- Your cured DTF transfer and blank shirt
Step 1: Pre-press the shirt by ironing it smooth on the pressing surface.
Step 2: Place the DTF transfer face-down on the shirt. Cover with parchment paper.
Step 3: Set iron to cotton setting (no steam). For cotton: approximately 300 to 320°F at the center plate. For polyester: one setting lower.
Step 4: Apply the iron to one section of the design. Press with your full body weight — lean directly down, do not push forward. Hold for 20 to 30 seconds per section without moving. Uneven pressure from sliding the iron is the primary failure mode.
Step 5: Move to the adjacent section, overlapping slightly, and repeat. Cover the entire design methodically.
Step 6: Allow to cool completely — 2 to 3 minutes. Peel slowly at a flat angle.
Step 7: Re-cover with parchment paper and press each section again for 10 to 15 seconds.
Honest assessment: Iron-applied DTF transfers have shorter wash durability than heat-press-applied transfers. A budget heat press ($150 to $200) immediately resolves the consistency issues an iron cannot.
DTF Printing vs Sublimation: Which Is Right for You?
| Feature | DTF Printing | Sublimation |
|---|---|---|
| Works on cotton | Yes | No (polyester only) |
| Works on dark fabrics | Yes | No (light colors only) |
| Full-color photographic detail | Yes | Yes |
| Feel on fabric | Slight surface layer | No feel — embedded in fiber |
| Wash durability | 50+ cycles | Permanent — lasts garment lifetime |
| Startup cost | $600 to $1,500 | $300 to $800 |
| Works on hard surfaces | No (use UV DTF for hard surfaces) | Yes (mugs, mousepads, etc.) |
Choose DTF if your customers want designs on cotton, cotton blends, or dark garments, and you need to serve a wide range of fabric types.
Choose sublimation if your primary products are white or light-colored polyester apparel, mugs, mousepads, or hard-coated items, and the zero-surface-feel result matters.
The practical answer for most beginners: DTF is more versatile. It handles every fabric type sublimation handles, plus cotton and dark garments that sublimation cannot touch.
Is DTF Printing Good Quality?
Yes — when done correctly.
A properly printed and applied DTF transfer produces:
Color accuracy: Full-color reproduction including gradients, shadows, and photographic detail. The white ink underbase ensures consistent color on any fabric color.
Edge sharpness: Fine text at 6 points, intricate line work, and detailed illustrations all transfer cleanly with quality film and correct settings.
Wash durability: 50 or more wash cycles without cracking, fading, or peeling — matching the durability of properly cured screen printing on comparable fabrics.
Flexibility: The TPU adhesive layer moves with the fabric. Designs do not crack when the shirt is stretched or worn through normal activity.
Surface feel: DTF transfers have a slight surface layer that can be felt — this is inherent to the process and distinguishes it from sublimation. High-quality film and correct pressing produce a soft, smooth surface feel.
The honest caveat: quality varies significantly based on film quality, ink compatibility, press settings, and curing completeness. Beginner failures — peeling, cracking, color shift — are almost always process problems rather than technology limitations.
DTF Printer for Beginners: What to Look For
Print width: A3 (13-inch) is the standard starting point. It handles adult shirt fronts, back prints, and oversized designs.
White ink circulation: White ink settles and clogs if not kept in motion. Look for a printer with automatic white ink circulation to prevent the most common DTF maintenance problem.
Print head type: Piezo print heads are more durable than thermal heads and handle DTF ink chemistry better. This is standard on quality DTF printers.
RIP software compatibility: Ensure the printer ships with or is compatible with RIP software that handles DTF ink layering — white underbase, CMYK, and varnish settings.
Support and documentation: For a beginner, good English documentation, video tutorials, and accessible technical support are worth more than a cheaper unit with none of these.
What to avoid: Converted consumer inkjet printers modified for DTF. While these exist as budget options, they lack white ink circulation, produce inconsistent results, and require ongoing maintenance that beginners find frustrating.
DIY DTF Printer: Can You Build Your Own?
The term DIY DTF printer refers to converted consumer-grade inkjet printers modified to run DTF ink and produce DTF transfers.
How it works: A standard consumer inkjet printer is modified to accept bulk DTF ink, loaded with DTF film, and operated with aftermarket RIP software. The conversion removes the original ink system and replaces it with a continuous ink supply system loaded with DTF-specific water-based pigment ink.
What it requires: A compatible base printer, DTF ink replacement, CISS kit installation, RIP software ($150 to $300 separately), and significant technical comfort with printer hardware.
Honest assessment: A DIY converted printer can produce acceptable DTF prints and costs 40 to 60% less than a purpose-built printer. However, it comes with tradeoffs — no white ink circulation, more frequent head clogs, no warranty coverage, and limited technical support. For beginners who prioritize ease of use, a purpose-built desktop A3 DTF printer is the better starting point.
Troubleshooting: Common Beginner Mistakes
Transfer peels at the edges after washing Cause: Under-pressing or skipping the second press. Fix: Verify actual press temperature with a contact thermometer. Increase press time by 2 seconds. Always perform the second press after peeling.
Powder contamination outside the design Cause: Non-anti-static film. Fix: Switch to dual-matte anti-static DTF film.
Blurry or smudged edges on the design Cause: Ink was handled while wet, or wrong film side used. Fix: Apply powder gently with a shaking motion. Verify you are printing on the coated, matte side of the film.
Colors are dull or faded Cause: Powder over-cured, or insufficient white ink layer. Fix: Reduce curing temperature by 10°F or reduce curing time. Check white ink density settings in RIP software.
Design is stiff or plasticky after pressing Cause: Ink deposit too heavy, or press temperature too high. Fix: Reduce ink density in RIP software. Reduce press temperature by 10°F.
Print washes out after first laundry Cause: Powder not fully cured, or fabric washed in hot water. Fix: Check curing — correct cure produces a smooth, slightly shiny surface. Verify washing instructions were followed.
Care Instructions for DTF Printed Garments
A correctly applied DTF transfer will last 50 or more washes with proper care. Include these instructions with every garment you sell.
Washing:
- Turn garment inside-out before washing
- Cold water only — below 86°F (30°C)
- Mild detergent — no bleach, no fabric softener
- Gentle or normal cycle
Drying:
- Tumble dry on low heat, or hang to air dry
- Do not dry on high heat
Ironing:
- Never iron directly on the design
- If ironing is necessary, turn garment inside-out and iron the reverse side only
First wash timing:
- Wait at least 24 hours after pressing before the first wash
FAQ
Is DTF printing good quality? Yes. When done correctly, DTF printing produces professional-quality results — full-color photographic detail, clean edges, vibrant colors, and 50 or more wash cycles of durability. Quality depends primarily on film quality, press settings, and correct curing. Most beginner quality failures are process issues, not technology limitations.
How to apply DTF transfers to shirts without a heat press? An iron can be used for occasional DIY applications. Turn off the steam function completely, set to the cotton setting (no steam), cover the transfer with parchment paper, and press firmly in sections for 20 to 30 seconds each. Iron-applied DTF transfers have approximately 30% success rate compared to 98%+ for heat press applications — for durability that lasts, a heat press is necessary.
How to apply DTF transfers at home? You need a heat press or iron, a cured DTF transfer, and a blank garment. Pre-press the garment to remove moisture, position the transfer face-down, press at the correct temperature and time for your fabric, peel, then second-press through parchment paper.
What is the difference between DTF printing and sublimation? DTF printing works on any fabric type and color. Sublimation works only on white or light-colored polyester fabrics. DTF produces a slight surface layer; sublimation is permanently embedded in the fiber with no surface feel. DTF is more versatile for most beginners.
Can I make a DIY DTF printer? Yes — a converted consumer inkjet printer can be modified to run DTF ink. Converted printers cost less but require more maintenance and produce less consistent results. For beginners prioritizing ease of use, a purpose-built A3 DTF printer is the better starting point.
What DTF film should a beginner use? Dual-matte anti-static DTF film in A3/A4 sheet format is the recommended starting point. Anti-static coating prevents the most common beginner mistake — powder contamination outside the design area. A3 sheets are easier to handle than rolls for first-time users.
How long do DTF prints last? Correctly applied DTF transfers last 50 or more wash cycles without cracking, peeling, or significant color loss. Durability depends on press settings accuracy, second press execution, film quality, and washing method.
How do I use DTF film and powder together? Print your design onto DTF film using a DTF printer. While the ink is still wet, sprinkle hot-melt adhesive powder evenly across the printed surface. Shake off excess. Cure the powder with heat at 250 to 280°F until it melts into a smooth, slightly shiny layer. Once cooled, the transfer is ready to press onto fabric.
What fabrics work with DTF film? DTF film works on virtually any fabric — cotton, polyester, cotton-polyester blends, nylon, denim, canvas, leather, and faux leather. It works on light and dark garments without any fabric pretreatment.
How much does it cost to start DTF printing at home? The minimum viable setup — heat press only, buying pre-made transfers — costs $150 to $400. A full in-house setup with an A3 DTF printer, basic powder-shaker curing system, and heat press costs $600 to $1,500.
Conclusion
DTF printing looks complex from the outside. Once you have done it once, it is not.
Print onto the film. Powder it while the ink is wet. Cure the powder. Press to the shirt. Second-press after peeling. That is the entire process.
The variables that determine quality — temperature, time, pressure, film coating, powder coverage — all have specific answers. The settings table in this guide covers every fabric you will encounter. The step-by-step process works for beginners with a brand-new setup and experienced operators running hundreds of shirts per week.
The things most worth remembering:
- Use quality DTF film with dual-matte anti-static coating — it eliminates the most common beginner failure mode before it starts
- Verify your actual press temperature with a contact thermometer before production
- Never skip the second press — it is what separates transfers that last one wash from transfers that last fifty
- Include care instructions with every garment — the customer’s washing method determines durability as much as your pressing technique
Start with a single shirt at the settings in this guide. Wash it once. If it holds, you have the process right. If it does not, the troubleshooting section tells you exactly what to adjust.
Haiyi manufactures DTF film with proprietary in-house coating technology — dual-matte anti-static rolls in 13-inch and 24-inch widths, A3/A4 sheets for beginners, and matched DTF ink systems. Factory-direct wholesale pricing, low MOQ, and 15 years of export experience serving print shops and distributors worldwide.