Read time: 13 minutes
Introduction
Your DTF transfer looked right coming off the press. Then you peeled the film and the design came with it. Or the transfer pressed down fine but lifted at the edges after one wash. Or it stuck in the center but not along the border.
Every one of these failures has a specific cause — and a specific fix.
DTF adhesion failures are not random. They follow patterns that map directly to process variables: temperature, time, pressure, powder curing state, fabric condition, film coating quality, and peel timing. When you understand which variable is off, the fix is straightforward.
This guide covers all 12 causes of DTF film not sticking — from the most common (wrong heat press settings) to the least obvious (consumable incompatibility) — with exact diagnostic tests and fixes for each one. UV DTF glass adhesion issues are covered separately as a distinct process.
Key Takeaways
- Wrong heat press temperature is the single most common cause of DTF not sticking — verify actual platen temperature with a contact thermometer before every new production batch
- Fabric moisture causes more adhesion failures than most operators realize — pre-press every garment for 3 to 5 seconds before applying the transfer
- Correct powder curing is identifiable by appearance: fully cured powder looks smooth, glossy, and slightly textured like an orange peel; under-cured powder looks matte or grainy
- Cold peel film peeled while still warm, and hot peel film peeled while cold, both cause partial adhesion and edge lifting
- The second press — 5 to 10 seconds through parchment paper after film removal — is the step that determines whether transfers hold through 50 washes or 5
- Low-quality DTF film with inconsistent coating produces adhesion failures no heat press adjustment can fix — batch-inconsistent results are a film quality signal
- UV DTF not sticking to glass requires different diagnosis than standard DTF — surface contamination and B film tack level are the primary variables
How to Diagnose Your DTF Sticking Problem
Before working through individual causes, identify which type of failure you are experiencing. The failure pattern points directly to the most likely cause.
Pattern A: Transfer peels completely off during film removal The transfer came off with the film as a single unit — no ink was left on the shirt. Cause: under-pressing (temperature, time, or pressure) or wrong peel timing (hot peel film peeled cold, or cold peel film peeled hot).
Pattern B: Transfer sticks initially but edges lift after washing The center holds; the border fails. Cause: insufficient pressure at the edges, skipping the second press, or under-pressing time too short to bond the perimeter.
Pattern C: Transfer fails immediately — never sticks Transferred design is completely absent after pressing. Cause: severe under-temperature, fabric contamination (moisture, chemical coating, fabric softener residue), or incompatible fabric type.
Pattern D: Patchy adhesion — some areas stick, some do not Parts of the design hold; other areas are missing or lifting. Cause: uneven powder coverage during application, cold spots on the heat press platen, or film coating inconsistency.
Pattern E: Sticks fine initially, peels off after two to three washes Initial adhesion appears correct; washing accelerates failure. Cause: powder under-cured (passed visual test but not fully bonded), insufficient press time, or skip of second press.
Pattern F: Transfer peels properly but feels weak or scratches off easily Visual result looks acceptable; adhesion strength is low. Cause: press temperature too low or time too short — the adhesive melted but did not penetrate the fiber weave sufficiently.
Cause 1 — Wrong DTF Heat Press Settings
This is the cause behind the majority of DTF not sticking failures. If you only check one thing, check this.
The hot-melt adhesive powder (TPU — Thermoplastic Polyurethane) requires a specific temperature range to melt, penetrate the fabric fiber weave, and form a durable bond. Too cold: the adhesive does not melt fully. Too hot: the adhesive becomes brittle and loses flexibility.
Symptom: Transfer peels cleanly, feels rubbery, or sticks initially but fails at first wash.
The display reading problem: Heat press displays are frequently inaccurate by 10 to 30 degrees. A display showing 320°F may deliver only 290°F at the platen surface. This is one of the most common sources of unexplained adhesion failures. An operator following correct settings based on the display is actually pressing at the wrong temperature.
Fix: Verify actual platen temperature with a contact thermometer, heat tape, or infrared thermometer before every new production batch. Do not trust the display reading. If the display reads 320°F and the actual surface is 295°F, increase the setting until the surface reaches the target.
Correct DTF temperature and time (starting points):
- Cotton: 315 to 325°F (157 to 163°C), 10 to 12 seconds, medium-high pressure
- Cotton/poly blend: 305 to 315°F (152 to 157°C), 10 to 12 seconds, medium-high pressure
- Polyester: 280 to 300°F (138 to 149°C), 10 to 12 seconds, medium pressure
- Performance fabric: 300 to 315°F (149 to 157°C), 12 to 15 seconds, medium-high pressure
Too cold signs: Transfer peels cleanly from shirt with no residue. Adhesive feels rubbery or gummy rather than bonded to fibers. Edge lifting after washing.
Too hot signs: Design cracks after washing, feels rigid, or fabric shows shine marks. Polyester may show dye migration (color bleeding from fabric into transfer area).
Cause 2 — Fabric Moisture and Surface Contamination
Moisture is the most overlooked cause of DTF transfer failure — because fabric that feels dry to the touch can still contain enough moisture to prevent proper adhesion.
When you press a garment with residual moisture, the heat creates steam between the fabric and the adhesive. This steam layer prevents the adhesive from penetrating the fiber weave. The transfer appears to stick during pressing, then lifts during the peel or fails at the first wash.
Symptom: Inconsistent results on garments from the same batch at the same settings. Transfers that work in the morning fail in the afternoon on hot, humid days. Transfers that work on one shirt fail on the next from the same stack.
Fix: Pre-press every garment. Place the empty shirt on the press platen and press for 3 to 5 seconds at your normal pressing temperature before positioning the transfer. This evaporates surface moisture and slightly opens the fiber structure for better adhesion. This step alone resolves a significant percentage of inconsistent adhesion failures.
Other surface contamination causes:
Fabric softener residue coats fabric fibers specifically to make them resist bonding — the opposite of what DTF adhesion requires. Garments washed with fabric softener before pressing will have reduced adhesion.
Lint, dust, and loose fibers create micro-barriers between the transfer and the fabric surface. A lint roller on the press area before applying the transfer eliminates this.
Fabric finishing chemicals — starch, anti-wrinkle sprays, sizing — can act as release agents that prevent adhesion. Pre-pressing helps, but heavily treated fabrics may require washing before pressing.
Fix for contamination: Pre-press, lint roll, and when in doubt, wash the garment before pressing. Avoid fabric softener in any wash prior to printing.
Cause 3 — Incomplete Powder Curing
The adhesive powder must be fully cured — melted and bonded to the ink layer — before pressing to fabric. Under-cured powder fails at the molecular level: it consists of loose particles rather than a continuous adhesive film, and it cannot create a strong bond with fabric fibers regardless of how well the heat press is set.
How to identify correct curing:
- Fully cured: smooth surface, slight gloss, slight texture resembling an orange peel, flexible when the film is bent
- Under-cured: matte surface, grainy or powdery appearance, may still show individual powder granules
- Over-cured: glass-like sheen, brittle, cracks when the film is bent
Under-cured powder that passes a visual inspection can still fail at washing. A transfer that looks well-cured may be only 80% cured — adequate for initial adhesion, insufficient for 50-wash durability.
Fix: Increase curing temperature or time incrementally until all powder shows the correct smooth-gloss appearance across the entire film sheet, including edges and fine design details.
Curing targets:
- Temperature: 250 to 280°F (120 to 140°C)
- Method: Curing oven is most consistent; heat gun is acceptable for very low volume but creates uneven cure; powder shaker with integrated curing unit is the production standard
Production test: Bend the cured film gently. If the powder cracks or flakes, it is over-cured and brittle. If it peels away in patches, it is under-cured. Correctly cured powder bends with the film without cracking.
Cause 4 — Uneven or Insufficient Powder Application
Powder must cover every area of the wet ink surface — not just the center of the design. Edges and fine details are where powder coverage is most commonly insufficient, and these are exactly the areas that peel first.
Symptom: Consistent adhesion in the center of the design; peeling, cracking, or missing ink at the edges after washing. Design fine details (thin lines, small text) disappear or peel while solid fill areas hold.
Common application errors:
- Applying powder only to the center of the design and missing the perimeter
- Shaking off excess powder too aggressively, removing powder from fine detail areas
- Applying powder too late — if the ink has begun to dry, powder does not adhere to it
Fix: Apply powder immediately after printing — do not wait more than a minute, as ink begins to set. Tilt and rotate the film to distribute powder to all edges. Tap the back of the film to shake off excess from non-printed areas, but do not shake so aggressively that you remove powder from fine details. Inspect the design edges under good lighting before curing.
For production volume: A powder shaker unit applies powder more evenly and consistently than manual application. At 20 or more sheets per day, the quality improvement from a powder shaker unit is measurable in reduced edge-peel failures.
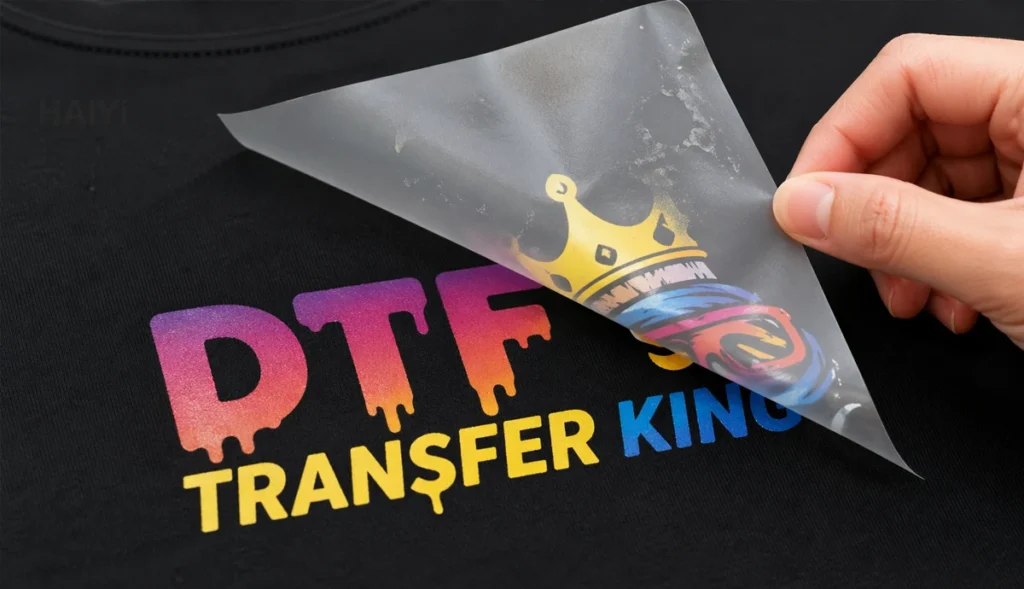
Cause 5 — Wrong Peel Timing
DTF transfer not peeling properly and DTF not sticking are often caused by the same mistake: peeling at the wrong time for the film type.
Every DTF film is designed for either hot peel or cold peel — and using the wrong method causes partial adhesion failures, ink lift, and edge damage.
Hot peel film peeled cold: The adhesive has solidified before the film is removed. Peeling requires more force, and the excess mechanical stress lifts ink from the design — particularly at fine details and edges.
Cold peel film peeled hot: The adhesive is still partially fluid. When the film is removed before the adhesive has set, the design partially follows the film rather than staying on the fabric.
How to identify your film type:
- Your film supplier should specify hot peel or cold peel on the packaging or product listing
- If unmarked: test with a small sample. Hot peel film releases cleanly when peeled immediately after pressing; cold peel film resists peeling until cool
Fix for hot peel: Peel within 10 to 15 seconds of removing the garment from the press while the transfer is still warm. Do not wait — once hot peel film cools, peeling becomes difficult and causes damage.
Fix for cold peel: Wait until the transfer has cooled completely to room temperature — approximately 60 to 90 seconds. Peel slowly at a flat, low angle. If the film resists, allow more cooling time.
Peel speed matters for both types: Peel at a slow, steady pace rolling the film back at a flat angle rather than pulling perpendicular to the shirt surface. Fast peeling creates mechanical stress that lifts ink at edges regardless of film type.
Cause 6 — Skipping the Second Press
The second press is the most commonly skipped step and one of the most impactful for long-term adhesion.
After peeling the film, the adhesive surface is exposed and slightly irregular. Pressing again for 5 to 10 seconds through parchment paper or a Teflon sheet drives the adhesive deeper into the fabric fiber weave, seals the design edges, and produces significantly better wash durability.
Quantifiable difference: Transfers second-pressed consistently show better wash durability than single-pressed transfers at identical first-press settings. The second press is what separates prints that hold through 20 washes from prints that hold through 50 or more.
Second press parameters:
- Same temperature as first press
- 5 to 10 seconds
- Medium pressure
- Always use parchment paper or Teflon sheet between platen and design (direct platen contact damages the print surface)
Fix: Make the second press a non-negotiable step in your standard workflow. Position it as step six in your pressing process so it never gets skipped during high-volume production.
Cause 7 — Incompatible or Difficult Fabric
Not all fabrics bond equally with DTF adhesive. While DTF works on most textiles, specific fabric properties can prevent proper adhesion.
Water-resistant and moisture-wicking coatings: Performance fabrics — athletic jerseys, outdoor jackets, some treated workwear — have chemical coatings applied to yarn surfaces that can block DTF adhesive from bonding with the fiber. The coating is designed to repel water; it also repels the adhesive.
Fix: Increase press time by 2 to 3 seconds and add a second press. If adhesion consistently fails on a specific treated fabric, that garment type may not be compatible with standard DTF.
Heavily textured fabrics: Terry cloth, corduroy, heavy knits, and waffle fabric have surface topography that prevents full contact between the transfer and the fabric. The adhesive can only bond at raised fiber points, leaving gaps.
Fix: Use a heat press pillow under the fabric to help the surface conform to the platen. Increase pressure. Accept that DTF adhesion on heavily textured surfaces will never match the results on smooth, flat fabric — consider whether the application is appropriate.
Synthetic performance fabrics with polyester content: Polyester requires lower pressing temperature than cotton (280 to 300°F versus 315 to 325°F). Pressing polyester at cotton settings risks dye migration — the polyester dye bleeds into the transfer area, creating color contamination that cannot be reversed.
Fix for polyester: Reduce temperature to 280 to 300°F. Test on a sample before production.
Nylon: Requires the lowest temperature of common DTF fabrics — 275 to 290°F — and cold peel. Nylon is heat-sensitive and will distort or melt at cotton pressing temperatures.
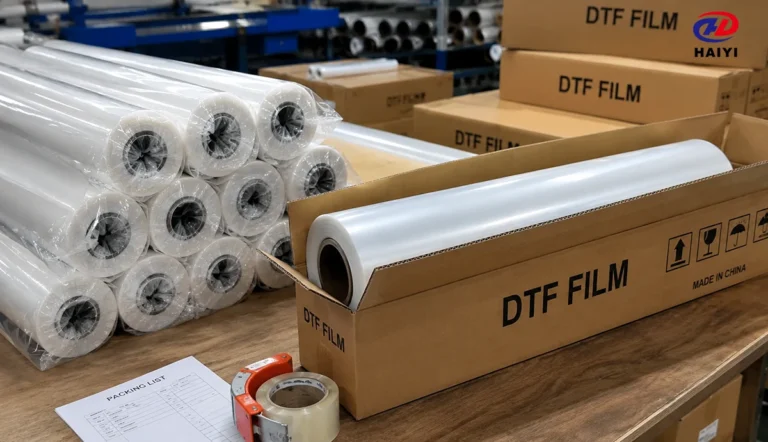
Cause 8 — Low-Quality or Degraded DTF Film
This is the cause that produces the most frustrating failures — because it appears identical to a settings problem, but adjusting settings does not fix it.
DTF film quality is determined by its coating — the layer that controls ink absorption, powder adhesion, and release behavior. A manufacturer that develops its own coating formula in-house maintains consistent specifications across every meter of every roll. A manufacturer reselling generic pre-coated PET substrate cannot guarantee this consistency.
Signs that film quality is the problem:
- Results are inconsistent within the same batch at identical settings — some shirts fine, others failing
- Powder does not adhere uniformly to the printed surface even when applied correctly
- Adhesion behavior varies significantly between rolls from the same supplier
- Fine design details consistently fail while solid fills hold
- The film releases unevenly during peeling — some areas clean, others tearing
What causes film coating failure:
- Generic pre-coated PET with no proprietary formulation — batch variation is inherent
- Improper storage (humidity, heat, direct sunlight) degrading the coating
- Expired film past recommended shelf life
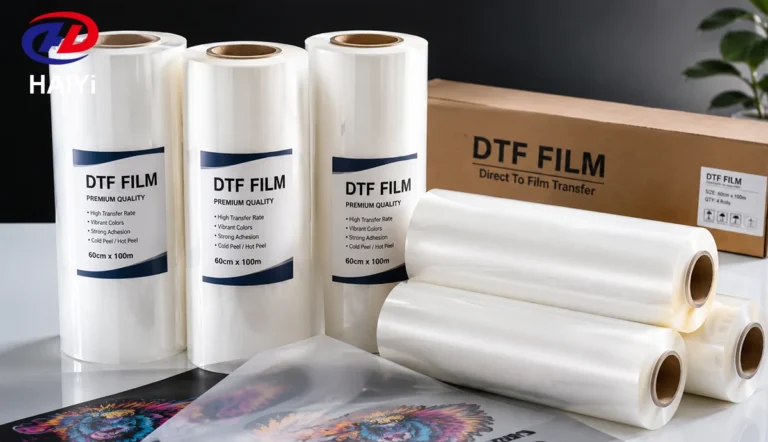
Fix: Source DTF film from a manufacturer that controls its own coating process. Dual-matte anti-static film — like Haiyi’s production rolls — applies an in-house-developed coating that maintains consistent ink absorption and powder adhesion across the full 100m roll length. Anti-static surface coating specifically prevents powder adhesion in non-print areas, eliminating one of the most common powder-related sticking failures.
Test a replacement roll from a different manufacturer or batch if batch-inconsistent results cannot be resolved by adjusting settings.
Cause 9 — Uneven Platen Pressure or Cold Spots
A heat press with cold spots — areas where the platen surface runs cooler than the display reading — creates partial adhesion. Parts of the design that fall on correctly heated areas stick; parts that fall on cold spots do not.
Similarly, uneven pressure across the platen produces strong adhesion where pressure is highest and weak adhesion where it is lightest — typically the corners and edges of the press.
How to test for cold spots: Press a full sheet of heat-sensitive paper or temperature-indicating tape across the entire platen at your normal pressing temperature. Cold spots appear as lighter areas. Most commercial heat presses have some temperature variation — 10 to 15°F variation is common; 30°F variation is a problem.
How to test for pressure evenness: The paper test — place a sheet of paper at each corner of the platen and try to pull it out with the press closed. Consistent resistance at all four corners indicates even pressure. Easy pull at any corner indicates low pressure in that area.
Fix: Recalibrate the press thermostat if cold spots exceed 15°F variation from the target. Use a silicone pressing pad under the garment — it distributes pressure more evenly and reduces the effect of platen hot and cold spots. Replace worn platens that have developed permanent deformities from impact or heavy use.
Cause 10 — Expired or Moisture-Damaged Adhesive Powder
Adhesive powder absorbs moisture from the air. Even sealed containers in humid environments accumulate moisture over time. Moisture-compromised powder clumps, melts unevenly during curing, and produces an adhesive layer that looks cured but has significantly reduced bonding strength.
Signs of compromised powder:
- Powder clumps when poured rather than flowing freely
- Cured surface has irregular texture — some areas smooth, others rough or granular
- Curing time increases — powder takes longer than usual to reach full melt
- Random adhesion failures across otherwise identical production runs
Fix: Store adhesive powder in sealed, airtight containers with silica gel desiccant packs. Keep in a cool, dry location away from the heat press (the press area radiates heat that accelerates moisture absorption). If powder shows visible clumping or takes more than 50% longer than usual to cure, replace it — the cost of fresh powder is far lower than the cost of a batch failure.
Shelf life: Most DTF adhesive powder has a recommended shelf life of 12 to 24 months under proper storage conditions. Powder stored in humid environments may degrade significantly faster.
Cause 11 — Consumable Incompatibility
DTF is a system: ink, film coating, adhesive powder, and heat press settings must all work together. Changing any one component without revalidating the system can introduce adhesion failures that appear unrelated to the change.
Ink-film incompatibility: DTF ink chemistry must match the film coating’s ink-absorption design. The coating is formulated for specific ink viscosities and pigment particle sizes. Using ink not matched to your film may cause ink to sit on the coating surface rather than absorbing into it — producing transfers that look correct but have weak adhesion.
Powder-temperature incompatibility: Hot-melt powders have different melt temperature ranges depending on formulation. A powder designed for a curing temperature of 260°F pressed at 280°F will over-cure; pressed at 240°F will under-cure. Always match powder to the curing temperature your setup can reliably achieve.
Film-powder incompatibility: Some film coatings have specific powder recommendations. Using a powder formulated for high-temperature curing with a film coated for standard-temperature applications produces adhesion failures that neither material alone would cause.
Fix: When you change any consumable — ink brand, film supplier, or powder batch — run a complete validation test: print, powder, cure, press, wash. Do this before running production. Document the settings that produce correct results for each consumable combination you use.
Cause 12 — UV DTF Not Sticking to Glass or Hard Surfaces
UV DTF film is a completely different product from standard DTF film — it uses UV-curable ink and a two-film (A/B) system to transfer designs to hard, rigid surfaces. The troubleshooting for UV DTF not sticking is distinct from standard fabric DTF.
How UV DTF adhesion works: A film carries the UV-cured design to the hard surface. The B film’s pressure-sensitive adhesive bonds to the surface using hand pressure or a squeegee — no heat pressing required. Adhesion depends entirely on: surface cleanliness, surface smoothness, B film tack level, and correct A film peel timing.
UV DTF not sticking to glass — most common causes:
Surface contamination is the primary cause. Glass contaminated with fingerprints, dust, cleaning product residue, or moisture will not bond reliably. Even a fingerprint in the placement area is enough to cause localized adhesion failure.
Fix: Clean glass surfaces with isopropyl alcohol immediately before application. Allow to dry fully. Handle the glass only by the edges after cleaning.
B film tack level mismatch: Standard-tack B film may not bond adequately to certain glass surfaces or textured glass. High-tack B film provides stronger adhesion but can damage delicate coatings.
Fix: Test standard-tack B film first. If adhesion fails on clean glass, switch to high-tack B film.
A film peeled too fast or at wrong angle: The A/B peel step requires slow, even peeling at a flat angle. Fast peeling creates mechanical stress that pulls ink from the B film adhesive, leaving gaps in the design on the glass.
Fix: Peel A film slowly at a 15 to 30 degree angle from the glass surface. Ensure the transfer is cool before peeling if using cold-peel UV DTF film.
Surface incompatibility: UV DTF does not bond reliably to silicone surfaces, highly textured glass, wax-coated surfaces, or surfaces treated with hydrophobic coatings. Test on the specific surface before production.
Fix: For difficult surfaces, test high-tack B film first. If adhesion still fails, the surface may not be compatible with UV DTF — consider alternative decoration methods.
DTF Heat Press Settings by Fabric: Quick Reference
Always verify actual platen temperature with a contact thermometer. Press displays are frequently inaccurate by 10 to 30 degrees. These are starting points — adjust based on verified temperature readings and wash test results.
| Fabric | Temperature | Time | Pressure | Peel Type |
|---|---|---|---|---|
| 100% Cotton | 315–325°F (157–163°C) | 10–12 sec | Medium-High | Hot or Cold |
| Cotton/Poly 50/50 | 305–315°F (152–157°C) | 10–12 sec | Medium-High | Hot or Cold |
| 100% Polyester | 280–300°F (138–149°C) | 10–12 sec | Medium | Hot Peel |
| Performance/Moisture-Wicking | 300–315°F (149–157°C) | 12–15 sec | Medium-High | Cold Peel |
| Nylon | 275–290°F (135–143°C) | 10 sec | Medium | Cold Peel |
| Fleece/Heavy Hoodie | 310–320°F (154–160°C) | 15–18 sec | Firm | Hot or Cold |
| Denim | 315–325°F (157–163°C) | 12–15 sec | Firm | Hot or Cold |
| Canvas/Tote Bag | 310–320°F (154–160°C) | 12–15 sec | Medium-High | Hot or Cold |
Second press: 5 to 10 seconds at same temperature through parchment paper or Teflon sheet — always.
DTF Transfer Not Peeling Properly: Separate Fixes
“Not sticking” and “not peeling properly” are related but distinct problems. Here are the specific fixes for peeling failures.
Film tears during peeling (ink stays on shirt, film tears): Peel too fast or at too steep an angle. Fix: peel slowly at a flat 15 to 20 degree angle, rolling the film back rather than lifting it perpendicular to the garment.
Film peels but takes ink with it (design lifts with film): Either the transfer was not pressed adequately (under-temperature, under-time, or under-pressure), or the film was peeled at the wrong time for its peel type. Fix: Verify heat press settings with a thermometer, confirm peel type, and apply the second press after peel.
Film sticks to the design after cold peel (film will not separate from ink): Film was not cooled sufficiently before peeling. Fix: Allow at least 60 to 90 seconds of cooling time, ensure the garment is at room temperature throughout the design area, then peel slowly.
Fine details tear or lift during hot peel: Hot peel was done correctly but the fine detail areas have insufficient adhesive coverage. Fix: Verify powder coverage at design edges and fine details before curing, or switch to cold peel for designs with high fine-detail content.
The Pre-Production Test Protocol
Running this protocol before each new production batch prevents the majority of adhesion failures before they occur.
Step 1 — Verify press temperature Use a contact thermometer or heat tape to confirm actual platen surface temperature at center and all four corners. Temperature variation greater than 15°F requires attention before proceeding.
Step 2 — Pre-press test garment Place blank shirt on platen and press 3 to 5 seconds. This removes moisture and reveals any fabric surface issues.
Step 3 — Print and cure test sheet Print a small test design on fresh film. Apply powder immediately. Cure to smooth-gloss finish. Verify cure quality by appearance before pressing.
Step 4 — First press test Apply test transfer at your current settings. Peel according to film type.
Step 5 — Second press Apply parchment paper and second-press 5 to 10 seconds.
Step 6 — Quality check Scratch edge of design with fingernail — no ink should lift. Flex the shirt — design should move without cracking.
Step 7 — Wash test (for new fabrics or consumables) Wash test shirt inside-out in cold water. Inspect after drying. If test passes, proceed with production. If test fails, identify the cause before running more shirts.
Document every test result — fabric type, press settings, film batch, powder batch, and outcome. This creates a reference for consistent production and faster diagnosis of future problems.
FAQ
Why is my DTF transfer not sticking to my shirt? The most common reasons are wrong heat press temperature (always verify with a contact thermometer — display readings are frequently inaccurate), fabric moisture (pre-press every shirt for 3 to 5 seconds), or skipping the second press after film removal. Work through the causes in order of likelihood: temperature first, fabric prep second, powder curing third.
Why is my DTF not sticking even at the right temperature? If temperature is verified and correct, the next most likely causes are: fabric moisture or contamination (pre-press and lint roll), under-cured adhesive powder (check for smooth-gloss cure appearance), insufficient press pressure, or low-quality film with inconsistent coating. If failures are inconsistent across identical garments at the same settings, film coating quality is the likely cause.
Why is my heat transfer not sticking to my shirt? For DTF specifically: verify press temperature with a thermometer, pre-press the garment, confirm powder was fully cured before pressing, check peel timing matches film type (hot or cold peel), and perform the second press. For other heat transfer methods: the same temperature and pressure variables apply, though powder curing and peel type are DTF-specific steps.
What are the correct DTF heat press settings? Starting settings: cotton 315 to 325°F for 10 to 12 seconds at medium-high pressure. Polyester: 280 to 300°F for 10 to 12 seconds at medium pressure. Performance fabrics: 300 to 315°F for 12 to 15 seconds. Always verify actual platen temperature — press displays are frequently wrong by 10 to 30 degrees.
Why is my DTF transfer not peeling properly? Film not peeling properly usually means peel timing or peel technique is wrong. Hot peel film should be peeled immediately while warm. Cold peel film should be fully cooled before peeling. Both require slow, flat-angle peeling rather than pulling perpendicular to the fabric. If ink lifts with the film during peeling, the transfer was under-pressed.
Why is my DTF peeling after washing? Post-wash peeling indicates the adhesive bonded to the fabric surface but not deeply enough into the fiber weave. Causes: temperature too low, press time too short, insufficient pressure, or skipping the second press. Verify temperature with a contact thermometer, add 2 seconds to press time, confirm medium-high pressure, and always second-press after film removal.
Why is my UV DTF not sticking to glass? UV DTF adhesion failure on glass almost always results from surface contamination. Clean the glass with isopropyl alcohol immediately before application and handle only by the edges afterward. If glass is clean and adhesion still fails, switch to a higher-tack B film. Some glass types with hydrophobic coatings or silicone surfaces are not compatible with UV DTF.
Can bad DTF film cause sticking failures? Yes. DTF film with inconsistent coating produces adhesion failures that heat press adjustments cannot resolve. Signs: inconsistent results across the same batch at the same settings, powder adhesion variations within a single sheet, and failures that appear random rather than systematic. Source film from a manufacturer that controls the coating formula in-house — like Haiyi’s dual-matte anti-static production film — to eliminate coating inconsistency as a variable.
What is the DTF temp and time for cotton? For 100% cotton: 315 to 325°F (157 to 163°C), 10 to 12 seconds, medium-high pressure. Always verify your actual press temperature with a contact thermometer before running production. Many heat press displays read 10 to 30°F higher than the actual platen surface temperature.
How do I fix DTF transfer that is not sticking? In order of frequency: (1) verify actual press temperature with a thermometer, (2) pre-press the garment 3 to 5 seconds to remove moisture, (3) check powder curing — should look smooth and glossy, (4) confirm peel timing matches film type, (5) perform second press after film removal, (6) check for fabric contamination or coating, (7) evaluate film quality if failures are inconsistent.
Conclusion
DTF adhesion failures follow patterns. Every pattern points to a specific variable. Every variable has a specific fix.
The most common failures — wrong temperature, fabric moisture, under-cured powder, wrong peel timing — account for roughly 80% of all DTF not sticking problems. The rest are less common but equally systematic: film quality, platen cold spots, moisture-damaged powder, consumable incompatibility.
The fastest path through troubleshooting:
- Verify actual press temperature with a contact thermometer — not the display
- Pre-press every garment before applying the transfer
- Check powder cure appearance — smooth and slightly glossy, not matte or grainy
- Confirm peel timing matches your film’s peel type
- Never skip the second press
- Evaluate film quality if failures are inconsistent at correct settings
DTF works consistently when the process variables are controlled. Temperature verification, garment pre-pressing, correct powder curing, and the second press are the four habits that prevent the majority of sticking failures before they happen.
The one variable that process discipline cannot fix is film coating quality. When adhesion results are inconsistent across identical settings on identical garments, the film is the variable. Quality DTF film from a manufacturer that develops and controls its own coating formula — rather than reselling generic substrate — eliminates coating inconsistency from your troubleshooting equation entirely.
Haiyi manufactures DTF film with proprietary in-house coating technology — dual-matte anti-static rolls in 13-inch and 24-inch widths, A3/A4 sheets, and matched DTF ink systems. Consistent coating formula across every production batch eliminates film quality as a variable in DTF adhesion troubleshooting. Factory-direct wholesale pricing and low MOQ available.