Introduction
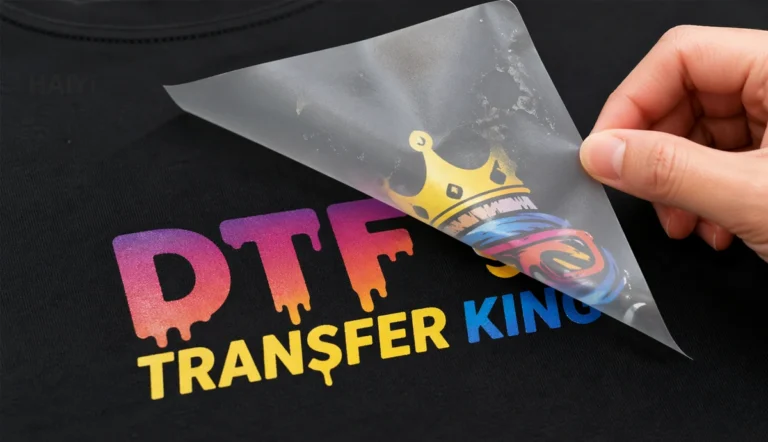
Your DTF print looked perfect coming off the heat press.
Then your customer washed it once and the edges started lifting. Or it arrived perfectly pressed but peeled back the moment you pulled the film. Or the design cracked in half after three washes.
Here is the truth: a properly applied DTF transfer should survive 50 or more wash cycles without cracking, fading, or peeling. When it fails before that, something went wrong in the process — and it is almost always fixable.
This guide covers every reason DTF peeling after washing happens, why transfers fail to stick during application, and exactly what to change to stop it. Each cause has a specific fix. Work through them in order from the most common to the most obscure, and you will find the problem.
Key Takeaways
- The majority of DTF peeling failures trace back to three variables: DTF heat press settings (temperature, time, pressure), skipping the second press, and wrong peel timing
- A properly calibrated heat press verified with a contact thermometer eliminates 80% of adhesion failures before they happen
- DTF cold peel produces better wash durability than hot peel in most applications — but both work when done correctly
- The second press — 5 to 10 seconds through parchment paper after peeling — is not optional for professional wash durability
- DTF film quality is the most underestimated variable — generic film with inconsistent coating causes adhesion failures that no heat press adjustment can fix
- Fabric surface contamination (moisture, lint, chemicals) is the most common cause of edge lifting on garments that otherwise press correctly
- Washing in hot water and skipping inside-out washing causes more customer complaints than any production error
- DTF vs screen printing durability comparison: correctly applied DTF matches or exceeds screen printing wash durability at equivalent volume
Why DTF Transfers Peel: The Root Cause Framework
DTF peeling is not random. Every failure traces back to one of four systems:
System 1: Heat application — temperature, time, and pressure during pressing System 2: Peel execution — hot vs cold peel, peel speed, second press System 3: Consumable quality — DTF film coating, adhesive powder, ink formulation System 4: Substrate and aftercare — fabric type, surface condition, washing method
Peel failures during application (before washing) almost always point to System 1 or 2.
Peel failures after washing almost always point to System 1, 2, or 4.
Peel failures that appear random — some shirts fine, some not — almost always point to System 3.
Work through this guide in order. Each section gives you the specific diagnostic question and fix.
Cause 1 — Wrong DTF Heat Press Settings
This is the cause behind more than half of all DTF peeling failures.
The DTF adhesive powder is a thermoplastic polyurethane (TPU) material. It requires a specific temperature range to melt, flow into the fabric weave, and form a flexible bond. Outside that range — too cold or too hot — the bond fails.
Too Low Temperature
If the temperature is too low, the powder does not fully melt. It sits on top of the fabric fibers rather than bonding with them. The transfer looks good immediately after pressing — then lifts at the first wash or within days.
Signs of under-temperature pressing:
- Transfer peels cleanly from the shirt, leaving minimal ink behind
- Edges lift after washing even though the center holds
- Transfer feels stiff or rubbery rather than part of the fabric
Fix: Verify your actual press temperature with a contact thermometer or heat tape. Press displays are frequently inaccurate by 10 to 30 degrees. If your display reads 320°F but the actual platen surface is 295°F, your transfers will fail consistently regardless of other settings.
Standard DTF temp and time for most fabrics: 305 to 325°F (152 to 163°C) for 10 to 15 seconds.
Too High Temperature
Excessive heat makes the adhesive brittle. Instead of a flexible bond that moves with the fabric, you get a rigid layer that cracks when the garment stretches or is handled in a washing machine.
Signs of over-temperature pressing:
- Transfer cracks in geometric patterns after washing
- Print has a hard, plasticky feel rather than soft integration with fabric
- Colors appear slightly washed out or have a sheen they should not
Fix: Drop temperature by 10 to 15°F and retest. Always test on a sample shirt before running a full batch.
Insufficient Pressure
Light pressure leaves air pockets between the transfer and the fabric. The adhesive does not penetrate the fiber weave — it bonds to the surface only. Surface bonds peel.
Signs of under-pressure pressing:
- Uneven adhesion — some areas hold, others lift
- Transfer peels off in patches rather than uniformly
- Edge lifting is worse on thick or textured fabrics
Fix: Increase pressure incrementally. The platen should visibly compress the garment surface slightly. On a screw-type press, medium-high pressure (7 out of 10) is the starting point for most DTF applications. Use a silicone pressing pad under the shirt to compensate for platen unevenness.
Uneven Heat Distribution
A heat press with cold spots — areas where the platen surface runs cooler than the display reading — creates partial adhesion. Parts of the design that landed on cold spots will peel; parts that landed on correctly-heated areas will hold.
Diagnostic test: Press a full sheet of heat-sensitive paper across the entire platen. Cold spots will show clearly as lighter areas.
Fix: Most commercial heat presses allow recalibration. If cold spots are persistent, a silicone pressing pad improves heat distribution across the platen surface.
Cause 2 — Skipping the Second Press
The second press is the single most impactful step most home operators skip.
After peeling the carrier film, the adhesive surface is exposed. Pressing again for 5 to 10 seconds through parchment paper or a Teflon sheet drives the adhesive deeper into the fabric weave, seals the design edges, and dramatically increases wash durability.
Transfers that have been second-pressed consistently outperform single-pressed transfers in washing tests. The difference between a transfer that lasts 20 washes and one that lasts 50+ washes is often this one step.
Second press parameters:
- Same temperature as the first press
- 5 to 10 seconds
- Medium pressure
- Always use parchment paper or a Teflon sheet between the platen and the design (direct platen contact will flatten and damage the print surface)
This step is not optional if you are selling finished garments to customers who expect professional durability.
Cause 3 — Wrong Peel Method
Whether you use hot peel or cold peel — and how you execute either — affects adhesion quality.
DTF Peel Hot or Cold: What the Difference Actually Means
Hot peel: Film is removed immediately after pressing, while the transfer is still warm. Faster workflow. The adhesive is still partially fluid when the film is removed, which can cause fine details to stretch or distort slightly if peeled too fast.
Cold peel: Film is allowed to cool completely before removal. The adhesive solidifies fully before the film is separated, producing cleaner edge definition, better detail retention, and generally superior wash durability.
The practical recommendation: cold peel produces more consistent results for most applications. Hot peel is appropriate when production speed is the priority and design complexity is low.
Peel Speed Matters
Whether hot or cold, peeling too fast causes mechanical stress on the adhesive layer. Peeling slowly — at a consistent low angle, rolling back rather than pulling straight up — minimizes this stress and reduces edge lifting.
A damaged edge during peeling looks like lifted ink at the perimeter of the design. Once that edge is lifted, washing will complete the failure.
Fix: Peel slowly. Always. Roll the film back at a flat angle rather than pulling it perpendicular to the garment. On cold peel film, wait until the transfer is completely cool before starting to peel.
Cause 4 — Poor Powder Curing
The hot-melt powder must be fully cured — melted and bonded to the ink layer — before pressing to the shirt. Undercured powder behaves like loose particles rather than a continuous adhesive layer. It provides weak initial adhesion and fails rapidly after washing.
Signs of Undercured Powder
- Transfer sticks initially but peels off as a complete unit with minimal ink residue on the fabric
- The back of the peeled transfer feels slightly rough or powdery rather than smooth
- Adhesion is better on the first shirt in a batch than on subsequent ones (powder degrades further with each pass through an underpowered curing setup)
Signs of Overcured Powder
- Transfer feels rigid and inflexible
- Cracking along design edges after the first few washes
- The adhesive surface has a glassy, overly smooth appearance rather than a slight texture
Correctly cured powder has a slight texture resembling an orange peel surface with a light sheen. It is flexible, slightly tacky to the touch, and bonds to itself when pressed together.
DTF temp and time for curing: 250 to 280°F (120 to 140°C) until the powder is fully melted. Curing time depends on your curing method — a curing oven produces more even results than a heat gun, which creates hot spots.
Fix for undercure: Increase curing time or temperature incrementally. Verify with a sample before production. If using a heat gun, move it continuously and maintain consistent distance from the film surface.
Cause 5 — Fabric Issues and Surface Contamination
A contaminated or unsuitable fabric surface blocks the adhesive from bonding to the fiber, regardless of how well everything else is done.
Moisture in the Fabric
Moisture is the most common surface contamination issue. A fabric that feels dry to the touch can contain enough moisture in its fiber structure to prevent proper adhesion. This is particularly common in humid environments and with certain synthetic fabrics that retain moisture.
Fix: Pre-press every garment before applying the transfer. A 3 to 5 second press at full temperature with no transfer in place evaporates surface moisture and slightly opens the fiber structure for better adhesion. This step alone resolves a significant percentage of adhesion failures on synthetic fabrics.
Chemical Coatings
Performance fabrics — moisture-wicking athleticwear, water-resistant jackets, some treated workwear — may have chemical coatings on the yarn surface that block adhesive bonding.
Signs: Transfer appears to stick well but peels cleanly from specific garment types while holding perfectly on standard cotton or cotton-blend shirts.
Fix: Test on the specific fabric before production. Increase press time by 2 to 3 seconds and add a second press. If adhesion consistently fails on a specific treated fabric, that garment may not be compatible with DTF.
Surface Contamination
Lint, dust, fabric softener residue, and fingerprints all reduce adhesion. Fabric softener is particularly problematic — it coats fiber surfaces specifically to make them resist bonding.
Fix: Pre-press to remove moisture and light contamination. Avoid handling the press area of the garment with bare hands before applying the transfer. If fabric softener residue is suspected, press a clean garment from the same batch as a control test.
Cause 6 — Low-Quality DTF Film or Consumables
This is the cause that produces the most frustrating failures — because it looks exactly like a settings problem, and adjusting settings does not fix it.
The Film Coating Problem
DTF film quality is determined by the coating — the layer applied to the PET substrate that controls ink absorption, powder adhesion, and release behavior. Manufacturers who develop their own coating formula in-house maintain consistent coating specifications across every meter of every roll. Manufacturers who purchase generic pre-coated PET substrate cannot.
Generic film with inconsistent coating produces:
- Patches where the transfer releases cleanly and patches where it lifts ink from the design
- Powder adhesion failures in areas where the coating does not hold the powder correctly
- Roll-to-roll variation where the first 10 meters work and meters 50 to 80 of the same roll do not
How to diagnose film quality problems: If your adhesion failures are inconsistent — some shirts in a batch fine, others failing at the same settings — and the fabric is consistent, the film is the most likely cause. Order a replacement roll from a different supplier and compare.
The fix: Source DTF film from a manufacturer that controls its own coating process. Factory-direct purchasing from an established manufacturer like Haiyi — which develops coating formulas in-house and tests every production batch — eliminates the batch-to-batch variation that generic film introduces. Dual-matte anti-static film is particularly important for production environments: the anti-static surface prevents powder adhesion in non-print areas that causes contamination failures.
Adhesive Powder Issues
Adhesive powder that has been stored in humid conditions absorbs moisture and clumps. Clumped powder distributes unevenly, creating areas of the transfer with insufficient adhesive coverage. Those areas will peel.
Fix: Store powder in a sealed container in a cool, dry environment. If powder appears clumped, discard and replace. Do not attempt to use powder that has been exposed to high humidity — the cost of replacement is far lower than the cost of reprints and customer complaints.
Ink Compatibility
DTF ink must be matched to the film coating chemistry. The coating is formulated to accept specific ink viscosities and pigment particle sizes. Using ink that is not matched to your film can cause the ink to sit on the coating surface rather than being absorbed into it — producing transfers that look fine but have weak adhesion.
Fix: When sourcing film and ink from separate suppliers, test compatibility on a small batch before scaling. Press test samples, wash them three times in cold water, and inspect adhesion before committing to production.
Cause 7 — DTF Peeling After Washing: Care Mistakes
A perfectly applied transfer can be destroyed by improper washing. This is particularly relevant for transfers that perform well initially but deteriorate after the first few washes.
Hot Water
Hot water softens the TPU adhesive. Repeated exposure to hot water gradually weakens the bond until the transfer begins to lift. The adhesive is designed to withstand normal washing — but most DTF adhesive formulations begin to soften above 60°C (140°F).
Washing instruction for customers: Cold water only (below 30°C / 86°F).
High Heat Drying
Tumble drying on high heat subjects the adhesive to temperatures that approach its softening point. Combined with mechanical agitation in the dryer drum, this accelerates bond failure.
Washing instruction: Tumble dry on low heat, or hang to air dry.
Washing Right-Side Out
Washing right-side out causes the design surface to rub against other garments, zippers, buttons, and the drum wall. Physical abrasion degrades the design surface faster than any other washing variable.
Washing instruction: Turn garments inside out before washing.
Bleach and Aggressive Detergents
Bleach breaks down both the ink chemistry and the adhesive polymer. Aggressive industrial detergents have similar effects at lower concentrations.
Washing instruction: Use mild detergent only. No bleach. No fabric softener.
The Care Card Solution
Include a printed care card with every garment order. State the four rules simply:
- Wash inside out in cold water
- Use mild detergent — no bleach
- Tumble dry on low heat or hang to dry
- Do not iron directly on the design
This single addition to your packaging eliminates the majority of customer wash-related complaints. Most DTF peeling complaints from customers are washing method failures, not production failures.
DTF Heat Press Settings by Fabric: Quick Reference
These are starting points. Verify your actual platen temperature with a contact thermometer before production. Press displays are frequently inaccurate.
| Fabric Type | Temperature | Time | Pressure | Peel Type |
|---|---|---|---|---|
| 100% Cotton | 315–325°F (157–163°C) | 10–12 sec | Medium-High | Hot or Cold |
| Cotton/Poly Blend (50/50) | 305–315°F (152–157°C) | 10–12 sec | Medium-High | Hot or Cold |
| 100% Polyester | 280–300°F (138–149°C) | 10–12 sec | Medium | Hot Peel |
| Performance / Moisture-Wicking | 300–315°F (149–157°C) | 12–15 sec | Medium-High | Cold Peel |
| Nylon | 275–290°F (135–143°C) | 10 sec | Medium | Cold Peel |
| Fleece / Heavy Hoodie | 310–320°F (154–160°C) | 15–18 sec | Firm | Hot or Cold |
| Denim | 315–325°F (157–163°C) | 12–15 sec | Firm | Hot or Cold |
| Leather / Faux Leather | 275–290°F (135–143°C) | 8–10 sec | Light-Medium | Cold Peel |
Important: Always run a wash test on an unfamiliar fabric before production. Pressing a single test shirt and washing it three times in cold water takes 90 minutes and can prevent an entire batch failure.
DTF Peel Hot or Cold: Which Should You Use?
This is one of the most commonly asked questions in DTF troubleshooting, and the answer depends on three factors: your film type, your fabric, and your production workflow.
Hot Peel
Peel the film immediately after pressing, while the transfer is still warm.
Advantages: Faster workflow — no waiting for the garment to cool. Better suited for high-volume production environments.
Disadvantages: Risk of stretching fine details during peel. More sensitive to peel speed — peeling too fast at this stage is more likely to cause edge lifting than with cold peel.
Best for: Standard cotton and cotton-blend garments with bold designs. Production environments where speed matters.
Cold Peel
Wait until the transfer is completely cooled to room temperature before peeling.
Advantages: The adhesive fully solidifies before separation, producing cleaner edges and better detail retention. More forgiving of peel speed variation. Generally produces superior wash durability.
Disadvantages: Slower — adds 1 to 2 minutes of cooling time per garment. In high-volume production, this requires more garments in rotation.
Best for: Performance fabrics, fine-detail designs, and any application where wash durability is the priority.
The practical recommendation: If you are experiencing peeling failures and currently using hot peel, switching to cold peel is the single fastest fix to try. It requires no equipment change, no settings adjustment, and no additional cost.
DTF Cold Peel Instructions: Step by Step
Follow these steps exactly for correct cold peel application.
Step 1 — Pre-press the garment. Set the empty garment on the heat press platen and press for 3 to 5 seconds at your normal pressing temperature. This removes moisture from the fabric and creates a smooth, receptive surface.
Step 2 — Position the transfer. Place the transfer face-down on the garment with the film side facing up. Align carefully — you will not be able to reposition once heat is applied.
Step 3 — First press. Apply heat and pressure at your fabric-appropriate settings (see table above). Standard starting point for cotton: 315°F, 10 to 12 seconds, medium-high pressure.
Step 4 — Allow complete cooling. Remove the garment from the press and set it on a flat surface. Do not attempt to peel until the transfer has cooled completely to room temperature — typically 60 to 90 seconds. Peeling while still warm defeats the purpose of cold peel.
Step 5 — Peel slowly. Grasp a corner of the carrier film and peel at a flat, low angle — rolling back rather than lifting straight up. Move slowly and evenly. If you feel resistance, stop and allow more cooling time before continuing.
Step 6 — Second press. Place parchment paper or a Teflon sheet over the exposed design and press again for 5 to 8 seconds at the same temperature and medium pressure. This is the step that locks the adhesive into the fiber and determines long-term wash durability.
Step 7 — Allow to cool before handling. Let the garment rest for at least 60 seconds after the second press before folding or stacking. The adhesive needs time to fully set.
DTF vs Screen Printing: Which Lasts Longer?
This is a real question from buyers comparing decoration methods, and the honest answer depends on how each process is executed.
Screen printing at its best — with properly cured plastisol ink on 100% cotton — produces extremely durable prints that can outlast the garment. However, screen printing fails faster than DTF when:
- Ink is under-cured
- Design is printed on polyester or blended fabrics without discharge treatment
- Fine detail work requires thin ink deposits that crack with fabric movement
DTF printing at its best — with quality film, correct heat press settings, and proper washing care — matches screen printing wash durability on comparable fabrics. DTF has additional advantages:
- Works on any fabric color and type without additional process steps
- No minimum order quantities — one shirt is as practical as one hundred
- Full-color photographic prints at any quantity
- No setup costs or screens
DTF vs screen printing durability summary: correctly executed DTF on cotton or cotton-blend garments will last 50 or more wash cycles — the same target durability as properly cured screen printing. DTF also exceeds screen printing durability on synthetic and blended fabrics where screen printing plastisol is more prone to cracking.
Where screen printing still wins: very high-volume runs of a single design on 100% cotton, and specialty inks (metallic, puff, discharge) that DTF does not replicate.
The Pre-Production Checklist
Run through this checklist before every new production batch. It takes 10 minutes and prevents the majority of DTF failures.
Equipment verification:
- Verify press temperature with a contact thermometer — not just the display reading
- Check platen for cold spots using heat-sensitive paper
- Confirm press pressure is set correctly for the fabric you are pressing
- Inspect silicone pressing pad condition — worn pads create uneven pressure
Consumables verification:
- Check DTF film for curl, edge damage, or coating inconsistencies before loading
- Verify adhesive powder is stored correctly and shows no clumping
- Confirm ink levels are adequate — low ink causes density problems in white underbase
Fabric preparation:
- Pre-press all garments to remove moisture
- Inspect for chemical coatings or treatments that may affect adhesion
- Avoid handling the press area with bare hands
Process verification:
- Run a single test shirt at your current settings
- Peel according to your film type (hot or cold)
- Perform second press on test shirt
- Wash test shirt before running the full batch if fabric type is unfamiliar
Settings documentation:
- Record successful settings for each fabric type in a production log
- Note which DTF film roll and batch was used
- Document any adjustments made during production
This documentation habit pays dividends when you encounter a problem — you can trace exactly what changed between a successful batch and a failed one.
FAQ
Why is my DTF transfer not sticking to my shirt? The most common causes are insufficient heat press temperature, pressure, or time during pressing. Verify your actual platen temperature with a contact thermometer — press displays frequently read 15 to 30 degrees higher than the actual surface temperature. Also check for fabric moisture: pre-press every garment for 3 to 5 seconds before applying the transfer to evaporate surface moisture that blocks adhesion.
Why is my DTF print peeling after washing? DTF peeling after washing most commonly results from under-pressing (temperature too low, time too short, or pressure too light), skipping the second press after peeling, or incorrect washing (hot water, high-heat drying, or washing right-side out). Check your press settings first, add a second press, and include care instructions with every garment you sell.
What are the correct DTF heat press settings? DTF heat press settings vary by fabric. Standard cotton: 315 to 325°F (157 to 163°C), 10 to 12 seconds, medium-high pressure. Polyester: 280 to 300°F, 10 to 12 seconds, medium pressure. Performance fabrics: 300 to 315°F, 12 to 15 seconds. Always verify actual platen temperature with a contact thermometer and run a wash test on unfamiliar fabrics before full production.
Should I use DTF hot peel or cold peel? DTF peel hot or cold depends on your film type and application. Cold peel generally produces better wash durability and cleaner edge definition. Hot peel is faster and adequate for most standard applications. If you are experiencing peeling problems with hot peel, switching to cold peel is the fastest fix to try — it requires no equipment change.
What are the DTF cold peel instructions? For DTF cold peel: press at fabric-appropriate temperature and time, remove the garment from the press, and allow it to cool completely to room temperature (60 to 90 seconds) before peeling. Peel the film at a flat, low angle slowly and evenly. Immediately follow with a second press of 5 to 8 seconds through parchment paper at the same temperature.
Why does my DTF transfer peel at the edges but hold in the center? Edge peeling with a secure center indicates uneven pressure — typically too light at the edges. This is often caused by a worn or improperly sized silicone pad, a slightly tilted platen, or insufficient pressure setting. Increase pressure one step, use a silicone pad, and always second-press to seal the edges.
How does DTF compare to screen printing for durability? DTF vs screen printing durability: correctly applied DTF on cotton or cotton-blend fabrics matches screen printing wash durability — both achieve 50 or more wash cycles when applied correctly. DTF exceeds screen printing durability on synthetic fabrics and multi-color designs on dark garments. Screen printing has durability advantages only on very high-volume single-design runs on 100% cotton.
Can bad DTF film cause peeling? Yes. Low-quality DTF film with inconsistent coating causes adhesion failures that no heat press adjustment can correct. Signs that film is the problem: inconsistent results within the same batch at the same settings, powder adhesion failures in patches, and peel behavior that varies across different areas of the same roll. Switching to factory-direct film from a manufacturer that controls its own coating formula resolves coating-related failures.
How long should a DTF print last? A properly applied DTF transfer on a compatible fabric should last 50 or more wash cycles without cracking, peeling, or significant color loss. Factors that affect lifespan: press settings accuracy, second press execution, film and adhesive quality, and washing method. Transfers washed in hot water without being turned inside out will fail significantly faster regardless of application quality.
What is DTF temp and time? Standard DTF temp and time for cotton is 315 to 325°F (157 to 163°C) for 10 to 12 seconds at medium-high pressure. For polyester: 280 to 300°F for 10 to 12 seconds at medium pressure. These are starting points — verify your actual platen temperature with a contact thermometer, as heat press displays are frequently inaccurate. Always run and wash a test shirt before production on any unfamiliar fabric.
Conclusion
DTF peeling is not a DTF problem — it is a process problem.
The technology works. A correctly applied DTF transfer on quality film with accurate heat press settings and proper washing care will outlast 50 wash cycles. The failures happen when one variable in the process is wrong, and most of those variables are easy to fix once you know which one it is.
Work through causes in order of likelihood:
- Verify actual press temperature with a contact thermometer
- Add the second press if you are not already doing it
- Switch to cold peel if hot peel is producing edge failures
- Check powder curing — look for the orange-peel texture of correct cure
- Pre-press every garment before applying the transfer
- Evaluate your film source if problems are inconsistent across the same batch
The most durable DTF prints in production come from operators who treat each variable systematically rather than guessing. Document your settings. Run wash tests on new fabrics. Use quality film from a manufacturer that controls the coating process.
When consumables are consistent and settings are calibrated, the second press and inside-out cold-water washing are the two steps that separate prints that last one wash from prints that last fifty.
Haiyi manufactures DTF film with proprietary in-house coating technology — dual-matte anti-static rolls in 13-inch and 24-inch widths, A3/A4 sheets, and matched DTF ink systems. Consistent coating formula across every production batch eliminates the film-quality variable from DTF adhesion troubleshooting. Factory-direct wholesale pricing, low MOQ, and 15 years of export experience. Contact us for a quote.